|
Mississippi Articles of Incorporation Domestic Profit Corporation |
The Mississippi Articles of Incorporation Domestic Profit Corporation will need to be submitted online via the Mississippi Secretary of State’s website. You will need to obtain a login, which you may do so from their home page located here: http://www.sos.ms.gov/BusinessServices/Pages/default.aspx. The Mississippi Secretary of State encourages its Incorporators to submit via the website however, will give you the option of printing and mailing the articles. This will involve a Full Payment of the $50.00 fee which must be remitted at the time of payment. If submitting electronically, this may be done by credit card while if mailing it, you will need to issue a check in this amount payable to “Secretary of State.”
While Mississippi Articles of Incorporation Domestic Profit Corporation must be filled out online, using the online form provided, you may mail in the printed articles by selecting an option. If so, it is worth mentioning that any paperwork required by the type of profit corporation being formed must be submitted simultaneously with these articles. If filing electronically, this may be done by attaching a PDF file containing such paperwork.
How To File
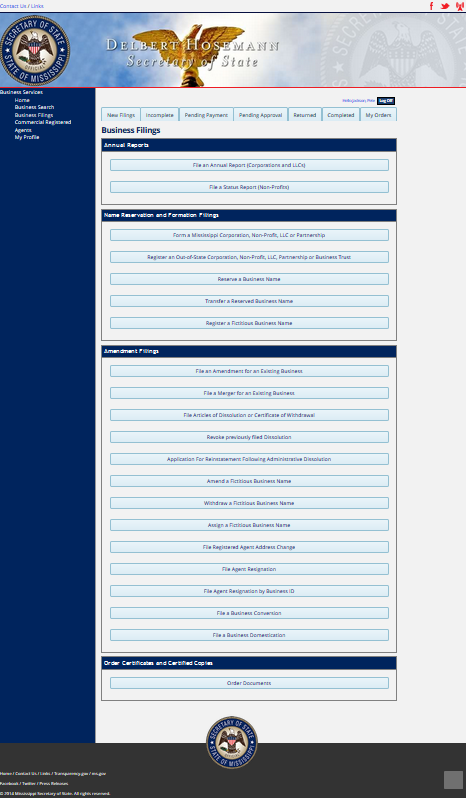
Step 1 – Log in to your Mississippi Secretary of State Business Services account here: https://corp.sos.ms.gov/corp/portal/c/page/login/portal.aspx. Once you have done so, locate the heading “Name Reservation and Formation Filings” then select the link labeled “Form a Mississippi Corporation, Non-Profit, LLC or Partnership.
 Step 2 – On the first page select the entity type you are forming (Profit Corporation) in the first field.
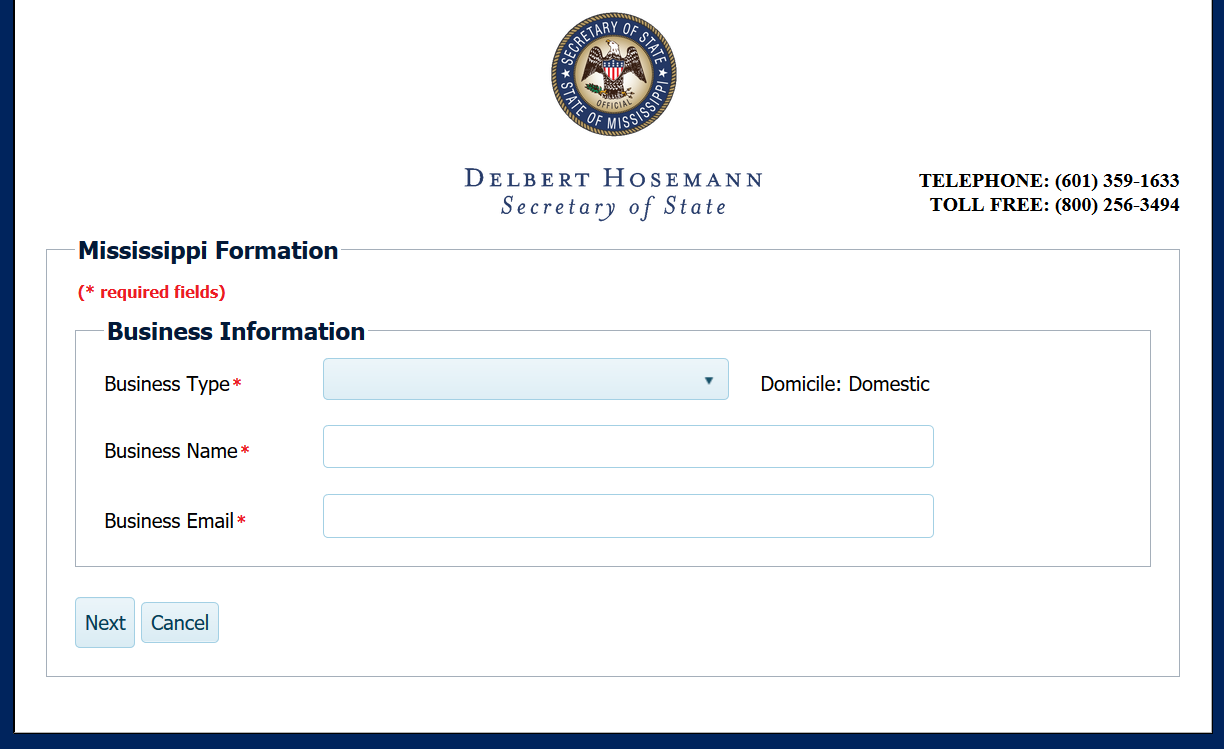 Step 3 – Once you do this several sections required by the Mississippi Secretary of State will appear. You may continue with the second field, “Business Name.” Enter the Full Name of the corporation being formed.
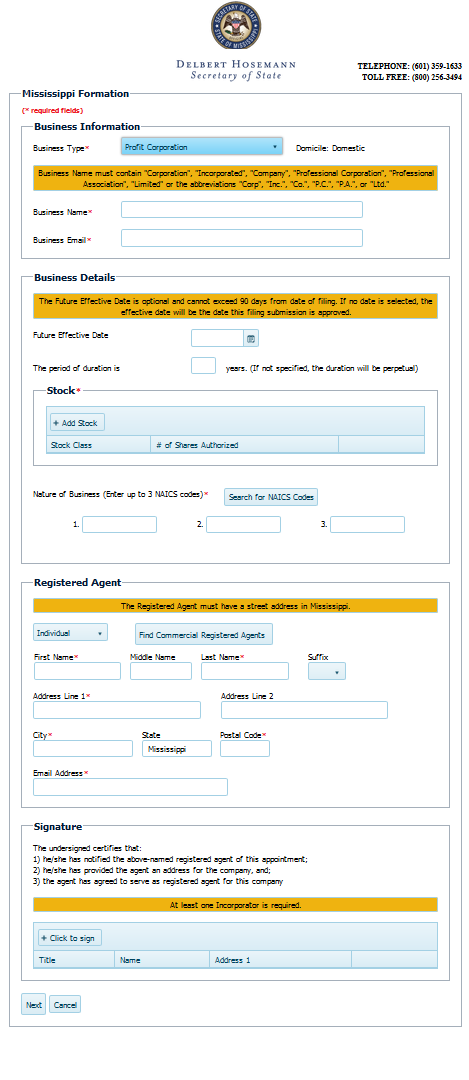 Step 4 – In the third field, “Business Email,” enter a reliable up to date E-Mail Address for the corporation being formed.
Step 5 – The next field, “Future Effective Date,” will give the option of reserving a “Future Effective Date.” This will separate the Date of Effect of a successful filing from the Filing Date. If desired, you may choose any date after the Filing Date within a ninety day time period. If left blank, the Date of Effect will be the same as the Filing Date.
Step 6 – The “Period of Duration” field may be used to define the time period for this corporation’s active status. If you intend for the corporation to cease corporate activities within a certain number of years, enter the number of years in the field provided. If not, you may leave this field blank to indicate this corporation will operate without a specific Termination Date.
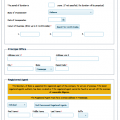
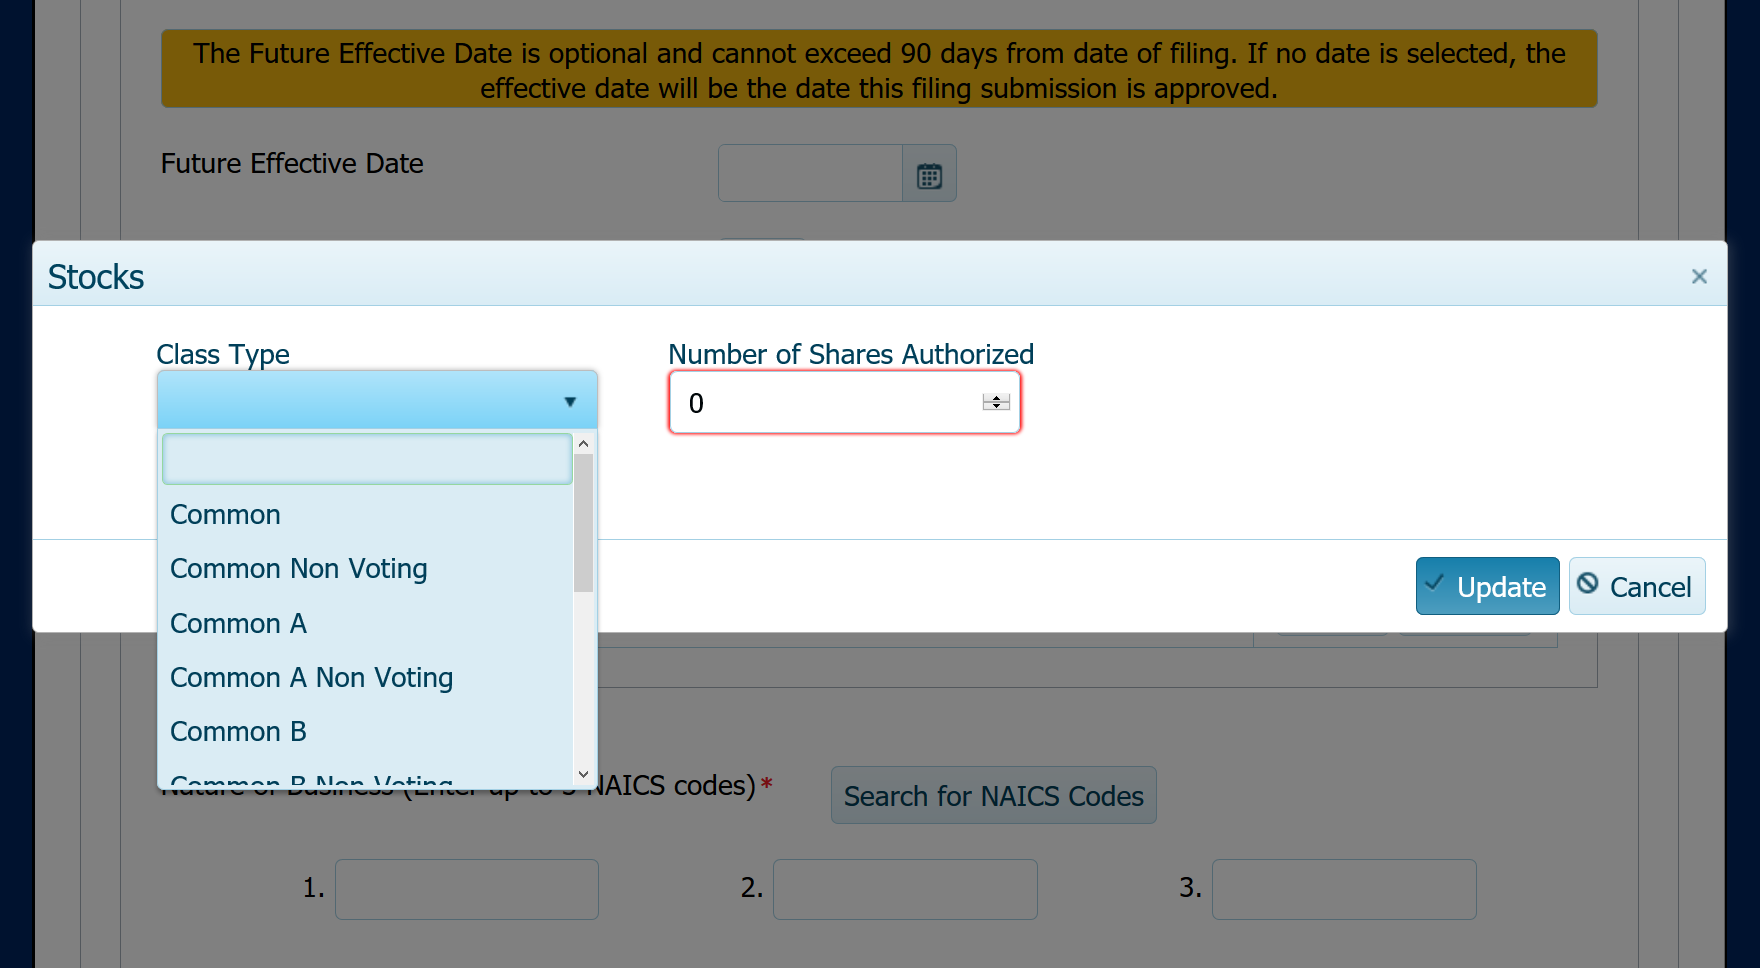
Step 7 – In the “Stock” section, you will need to define Number of Authorized Shares for each Class of Stock (or Common Stock). To do this, select the button labeled “Add Stock.” Once you do so a pop up window will appear.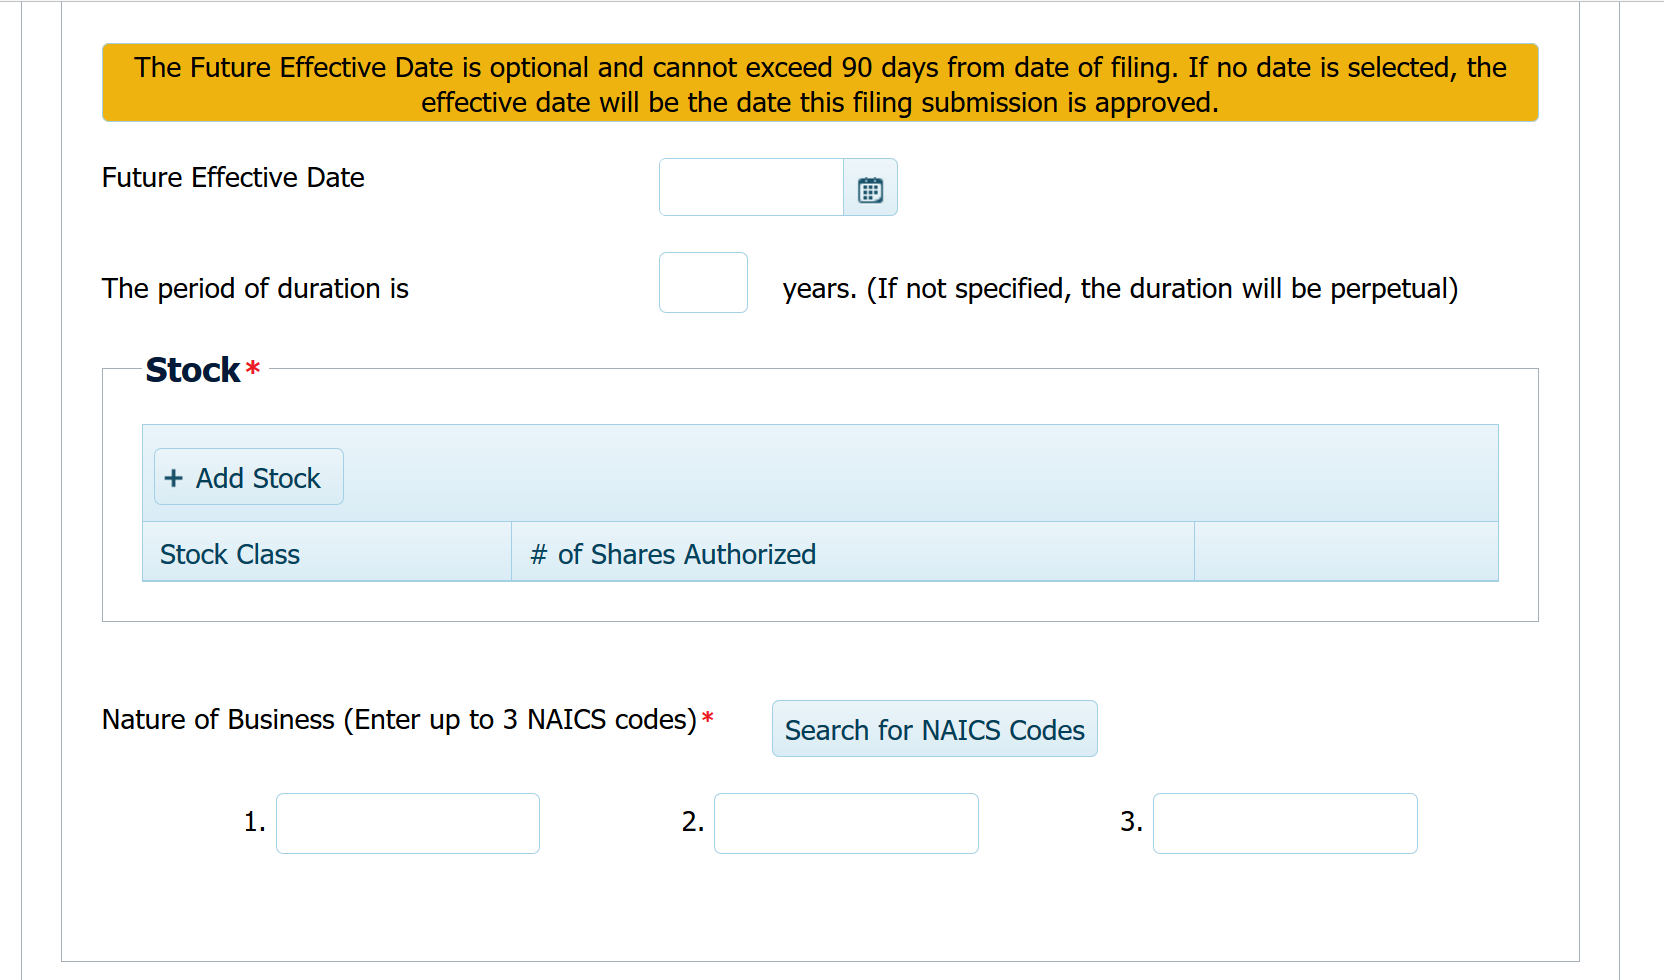 Step 8 – The pop up window will have two fields: Class Type and Number of Shares Authorized. You must select the Class from the drop down list provided then enter the Number of Shares. When done, select the “Update” button. This will cause your entries to be displayed in the table provided in the “Stock” section. You may “Edit” or “Delete” any entry by selecting the appropriate button in that row.
 Step 9 – In the “Nature of Business” section you must report at least 1 NAICS code to define the purpose of the business. You have the opportunity to enter three.
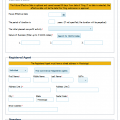
Step 10 – The next section, “Registered Agent,” requires the Type, Identity, Physical Address, and E-Mail Address of the Registered Agent you have obtained for your corporation. The Type may be an Organization or an Individual and may be chosen from a drop down list. You may choose to autopopulate the fields with your Register Agent if you have obtained a commercial Registered Agent.
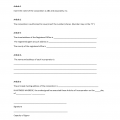
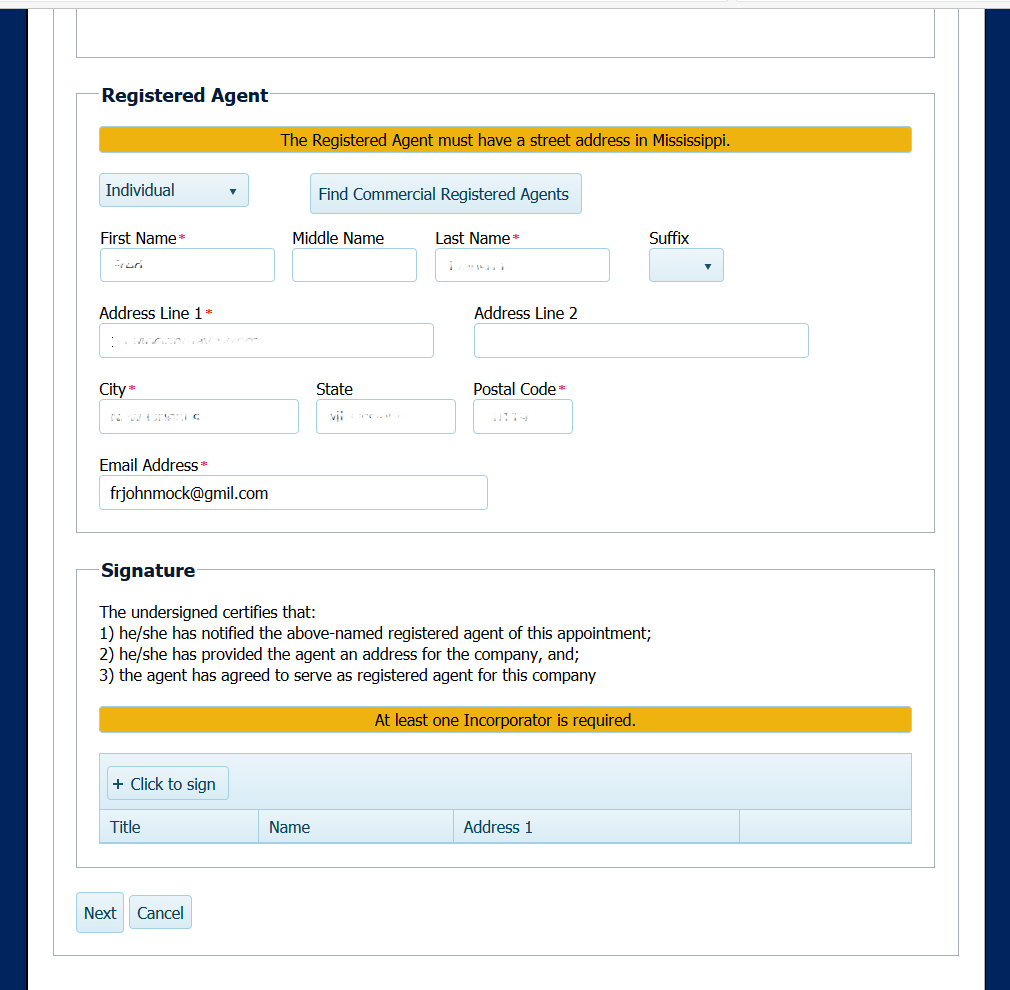 Step 11 – The Signature section at the end of the form will attest that an Incorporator has obtained consent from the Registered Agent that he/she/it will act as such. When ready to sign this, select the button labeled “Click to sign.” This will generate a pop up window.
Step 12 – The Incorporator signing this must fill in the following fields: First Name, Middle Name, Last Name, Suffix, Address Line 1 (Address Line 2 is optional), City, State, and Zip Code. Once done, select the “Update” button. This will display the Incorporator Signature Information in a table with an Edit button and a Delete button for each row. Once you are done, select the “Next” button.
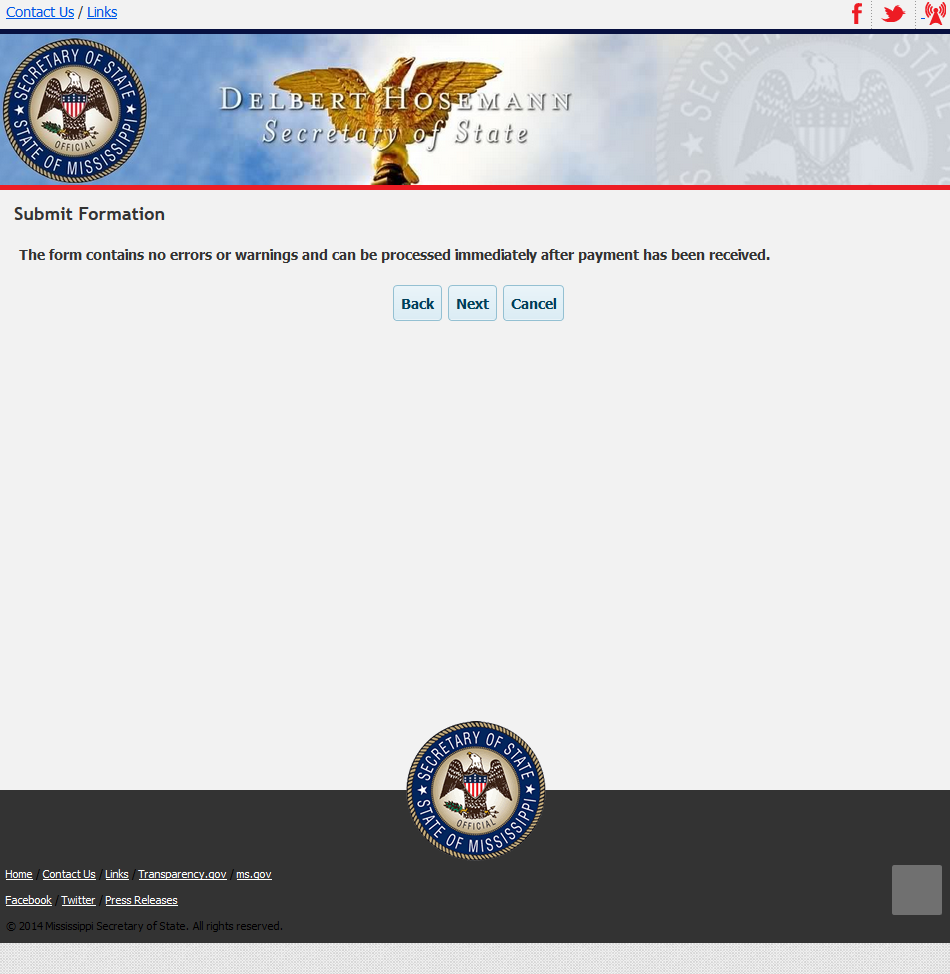
Step 13 – The system will analyze your information. If there are no errors, you may select “Continue” to proceed.
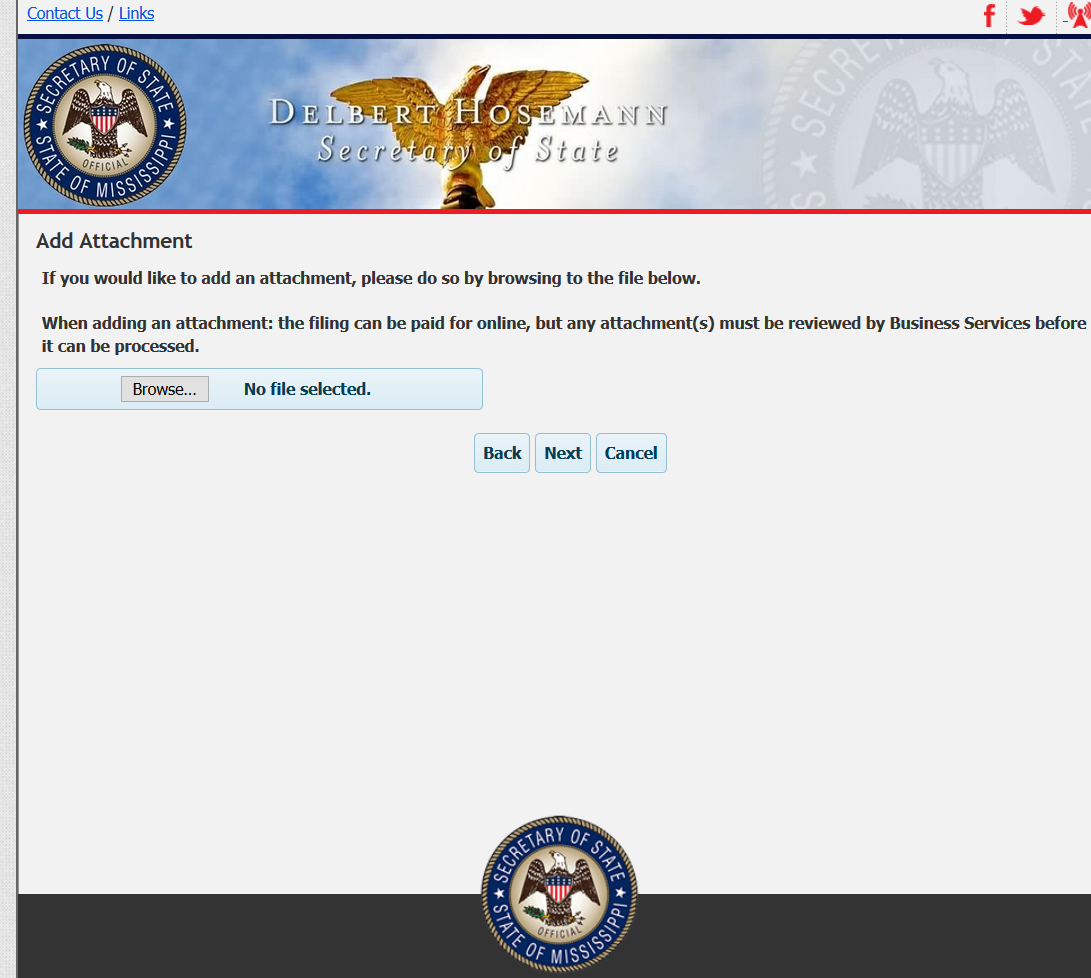
 Step 14 – This page will give you an opportunity to upload any additional documents necessary for this filing. You may do so by selecting the “Browse” button to locate the file on your machine. When done, select “Continue.”
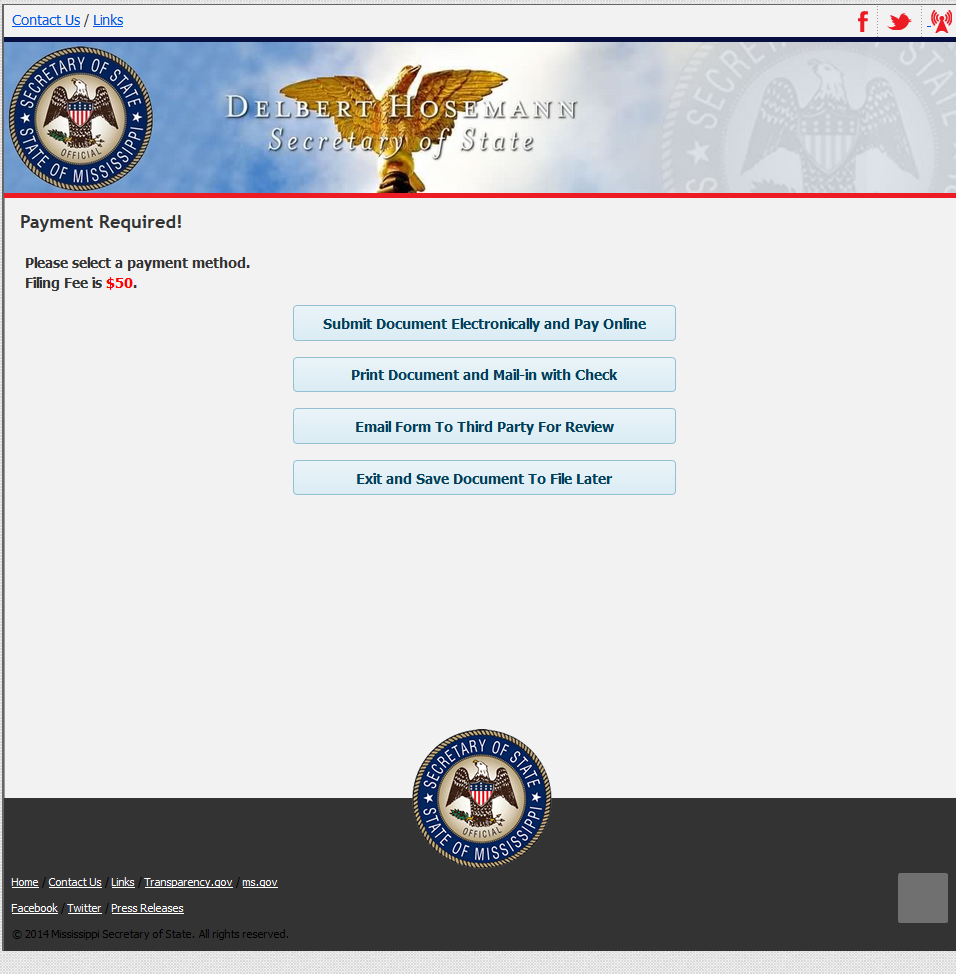
Step 15 – The final page will provide four options for producing this form “Submit Document Electronically and Pay Online,” “Pint Document and Mail-In with Check,” “Email Form to Third Party For Review,” “Exit and Save Document to File Later.” If you file by mail, you will need to include a check for the $50.00 Filing Fee that is made payable to the Secretary of State. If you file electronically, you will need to enter your credit card information in the payment area to pay the Filing Fee.