|
Oregon Articles of Incorporation Nonprofit |
The Oregon Articles of Incorporation Nonprofit must be filled out to the satisfaction of the Oregon Secretary of State’s Corporation Division whenever a nonprofit entity wishes to form in this state. There are many types of nonprofit corporations and depending on the goals/operations of the one being formed more information may need to be presented. For instance, if a corporation intends on seeking Tax-Exempt Status then certain parts of this form must be filled out with a 501(c)(3) compliant language. Incorporators will be expected to take every step in fulfilling all requirements for all government entities when forming any type of corporation. More often than not, it is considered wise to consult such entities as an attorney, professional accountant, and/or the Internal Revenue Service before filing this paperwork.
The Filing Fee for the Oregon Articles of Incorportion Nonprofit is $50.00 and this must be submitted by the time of filing. Make this check payable to “Corporation Division” if submitting these articles by mail or prepare to pay this field with a credit card if submitting online.
How To File
Step 1 – Select the “Download Form” above then fill out the articles using either a PDF editing program or by printing it then filling out the information with black ink.
Step 2 – In the article labeled “Name of Corporation,” report the Full Name of the corporation being formed. This should include one of the words (or an abbreviation) of incorporation (i.e. Incorporated, Corporation, etc.).
Step 3 – Article 2, titled “Registered Agent,” requires the Name of the Registered Agent obtained for this nonprofit corporation to be entered on the blank line provided.
Step 4 – Article 3, or “Registered Agent’s Publicly Available Address,” will need the Address of the Registered Office to be entered on the blank line provided. This may not contain a P.O. Box and must be the physical location of the Registered Agent.
Step 5 – Article 4, or “Address Where The Division May Mail Notices,” enter the Full Address where the Oregon Secretary of State may contact the forming nonprofit corporation regarding these articles.
Step 6 – Article 5, or “Type Of Corporation,” you will need to tighten the definition of the entity type beyond nonprofit. If this is a Public Benefit corporation select the first radio button, if this is a Mutual Benefit corporation select the second radio button, or if this is a Religious corporation select the third radio button. You may only select one of these buttons.
Step 7 – In Article 6, or “Will The Corporation Have Members,” select the first radio button if the forming entity will have members. If the forming entity will not have members then select the radio button labeled “No.” Some information regarding the definition of members are provided below these buttons. Make sure you are familiar with this text.
Step 8 – Article 7, or “Distribution Of Assets Upon Dissolution,” requires a full description of how the Assets or Properties of this corporation shall be distributed if or when it dissolves. If any party such as an Board Member possesses any privileges or limitations in the process, this should be reported here. You may continue this section on a separate and properly labeled sheet of paper if there is not enough room.
Step 9 – Article 8 will provide two radio buttons. If there are any additional provisions which must be included with these articles then select the first radio button and attach these provisions. If the corporation chooses to indemnify its Officers, Directors, etc. under ORS 65.387 – 65.414 then choose the second radio button.
Step 10 – Article 9, or “Who Is Forming This Business,” must document a full Roster of all the Incorporators. This Roster should include the Full Name and Complete Address of each Incorporator. This should be a complete list so if there is not enough room, complete it on a separate sheet of paper.
Step 11 – Article 10, or “Execution/Signature Of Each Person Who Is Forming This Business (Incorporator),” each Incorporator listed in Article 9 must Sign and Print his or her Name and report his/her Title. Each one must do so on his or her own line in the appropriately labeled areas.
Step 12 – Report the Name and Phone Number of the Contact the Oregon Secretary of State may call regarding these articles on the spaces provided in “Contact Name” and “Phone Number” respectively.
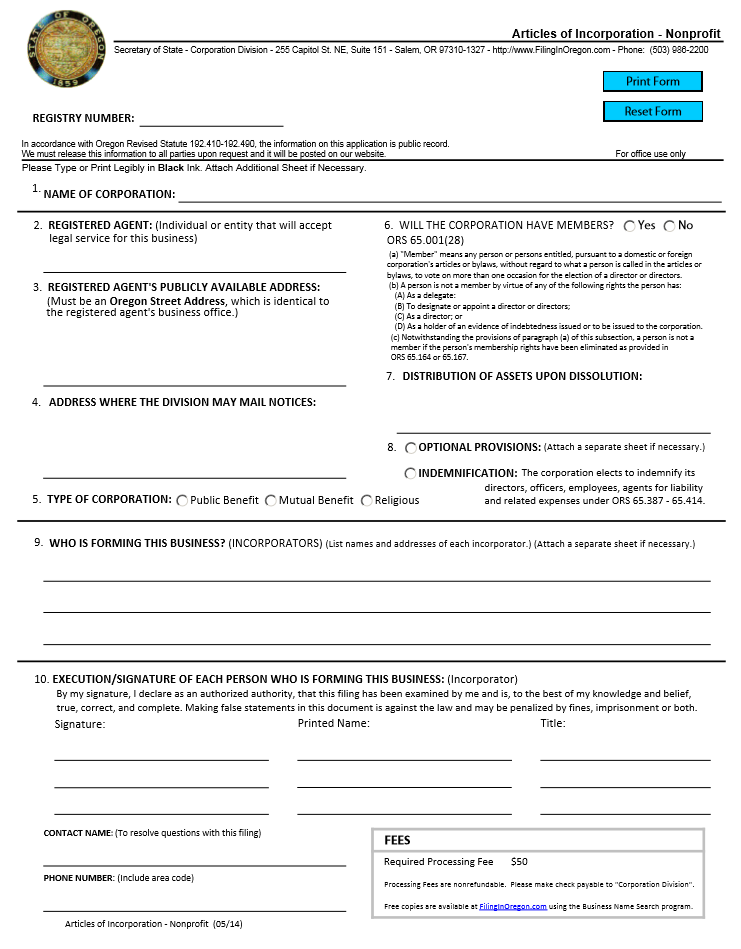
Step 13 – Next, make sure to organize all the paperwork that must accompany the Oregon Articles of Incorporation Nonprofit and a check made out to “Corporation Division” for the Filing Fee of $50.00. Then mail this package to the Oregon Secretary of State Corporation Division
Mail To:
Secretary of State
Corporation Division
255 Capitol Street NE Ste 151
Salem, OR 97310-1327
How To File Electronically
Step 1 – Go to the Business Registration Forms Page located at http://sos.oregon.gov/business/Pages/business-registration-forms.aspx then select the link labeled “Oregon Nonprofit Corporation.”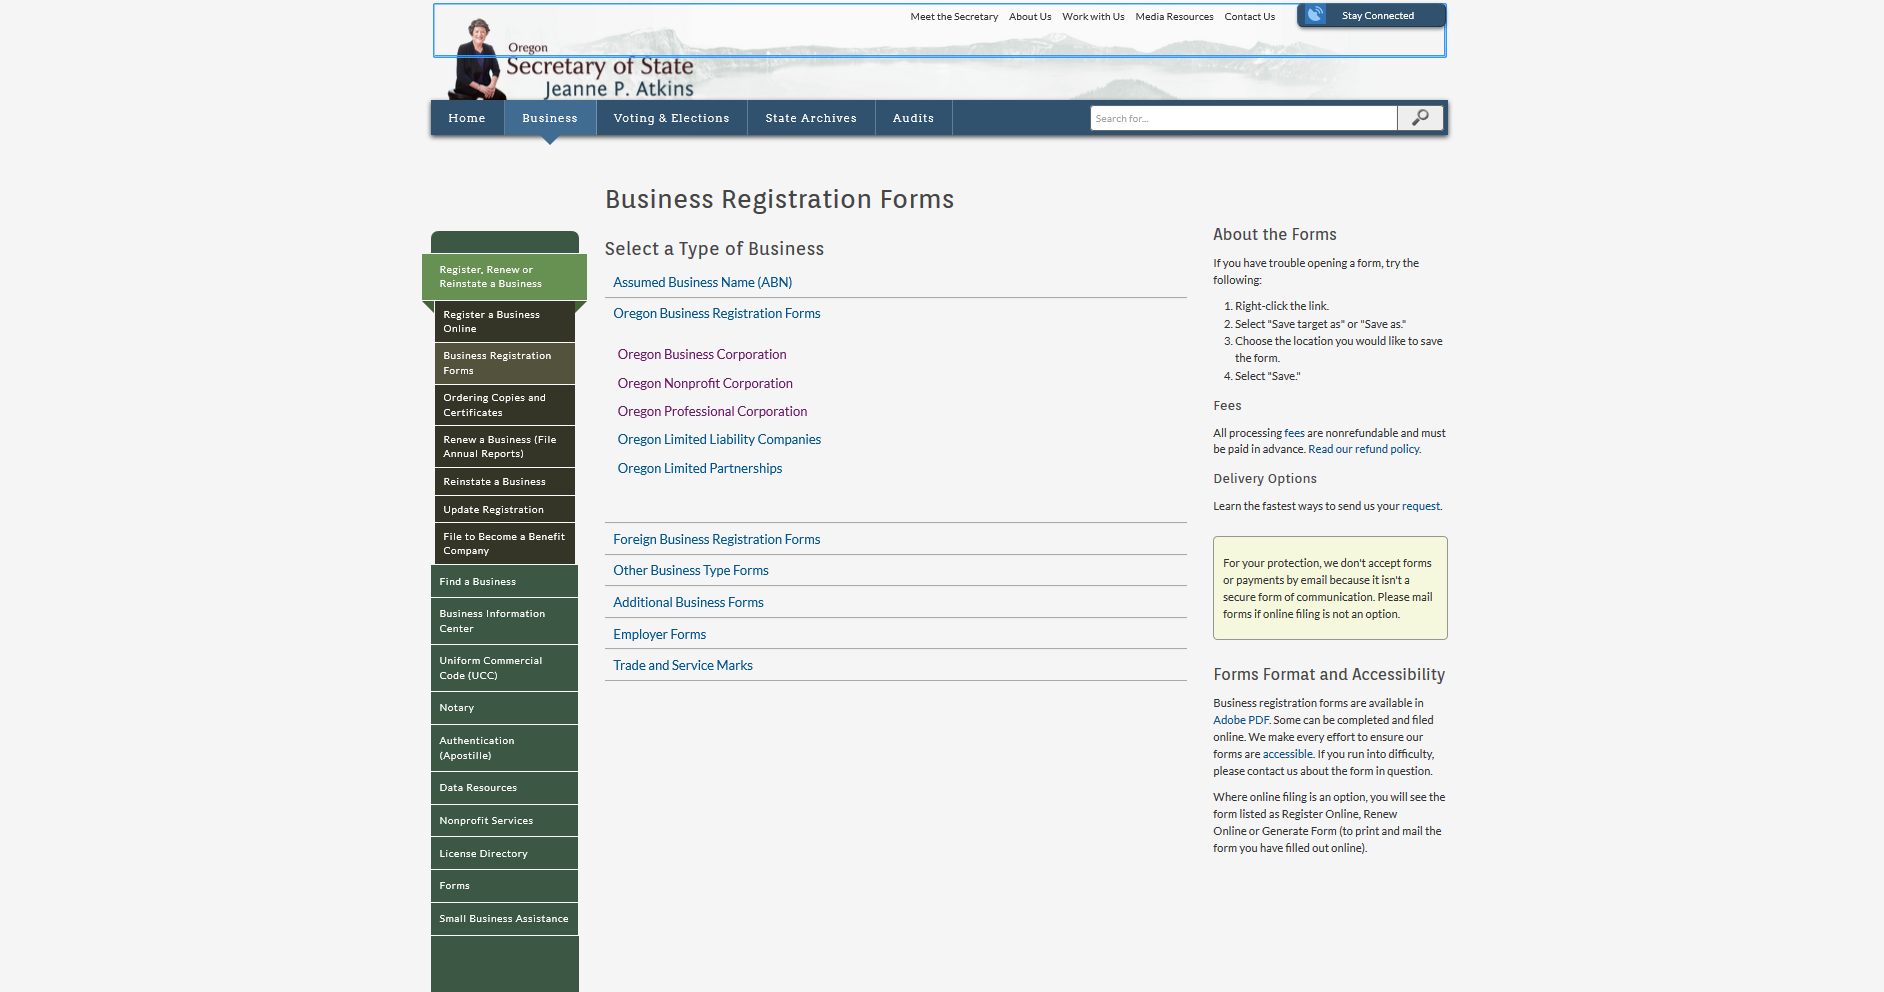
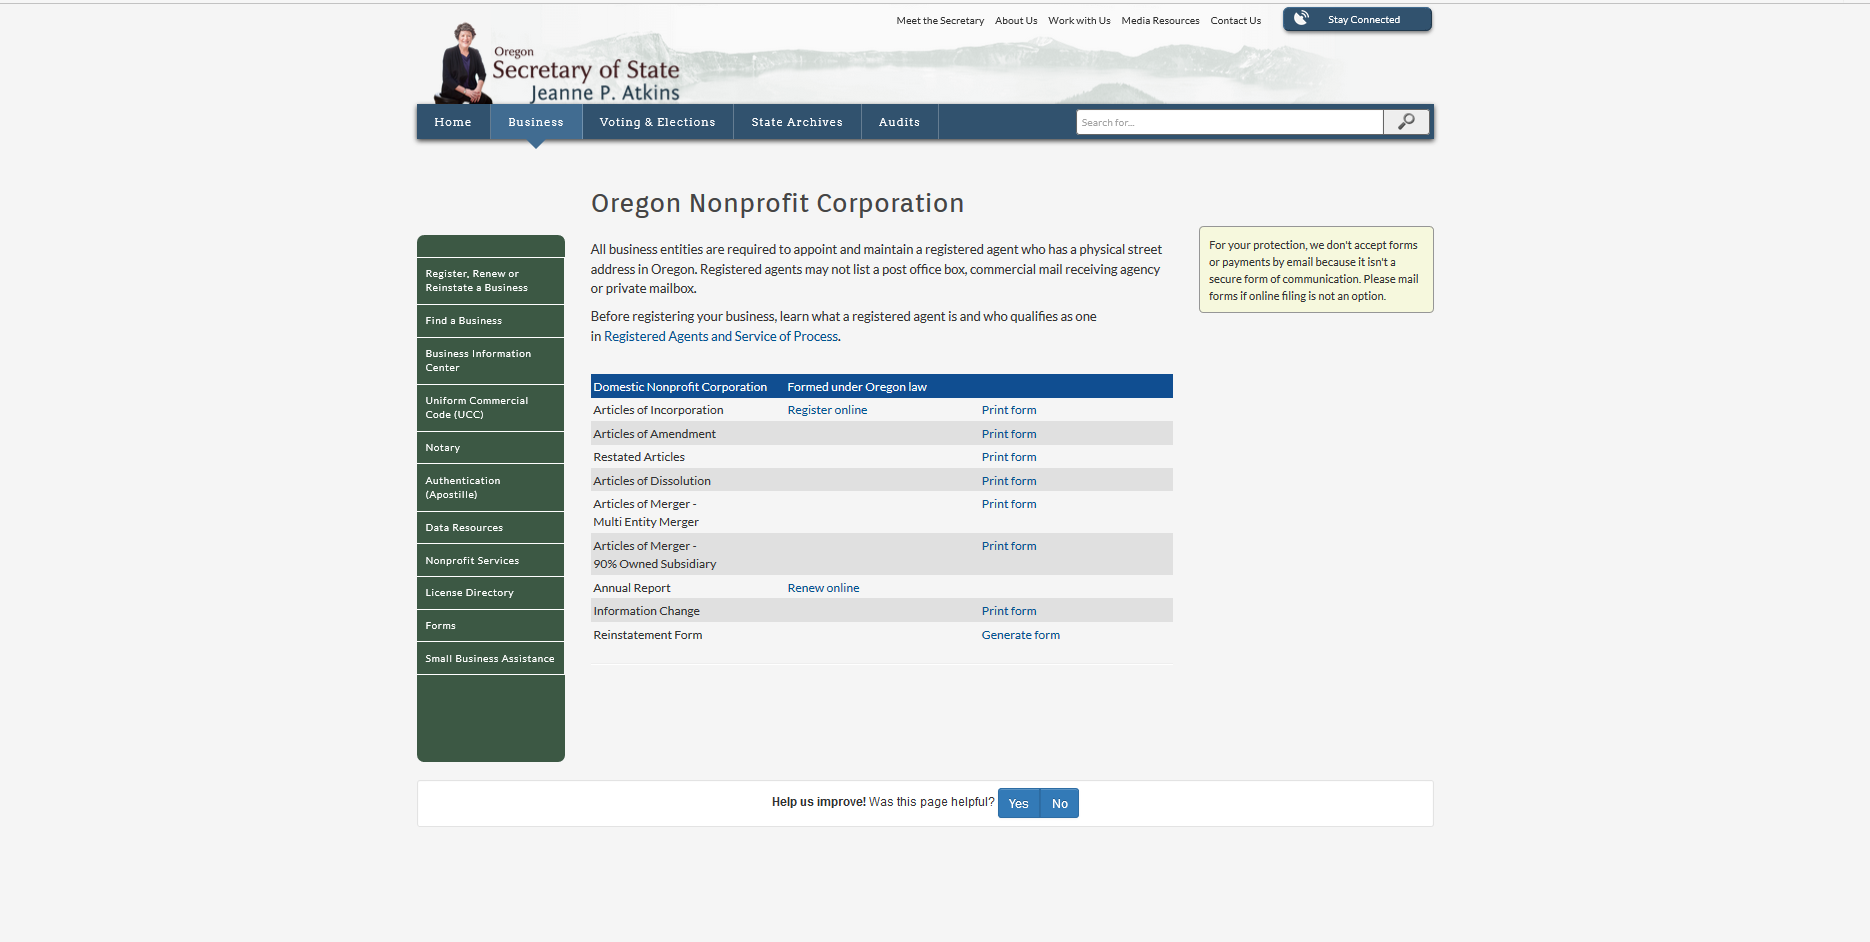
Step 2 – On the line beginning with “Articles of Incorporation,” select the link labeled “Register Online.” A pop up window will display with a disclaimer. Select “Continue” to proceed.
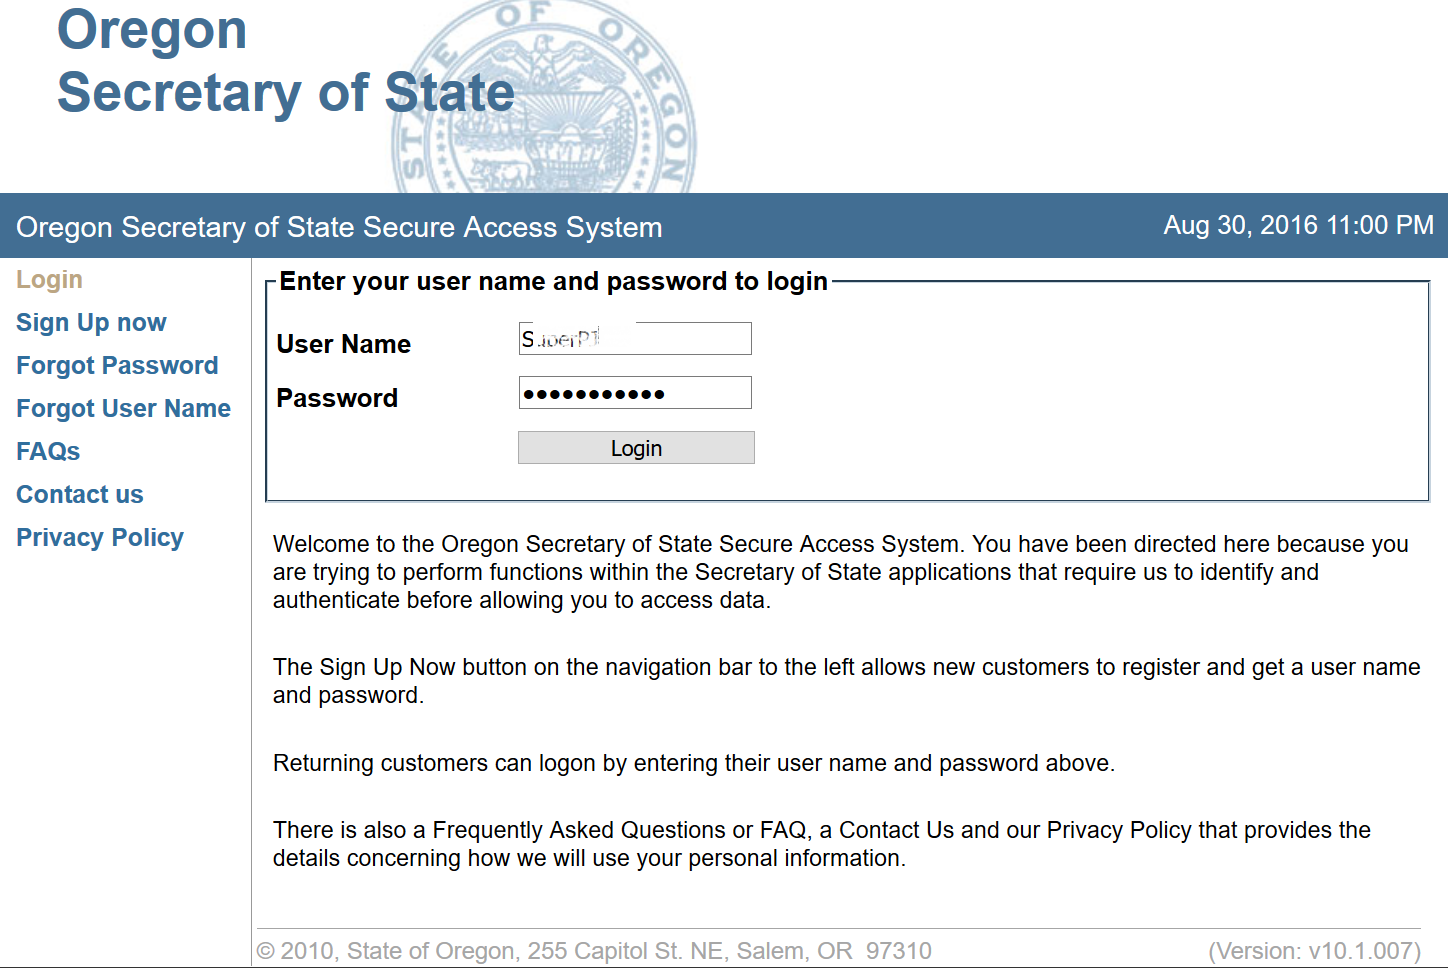
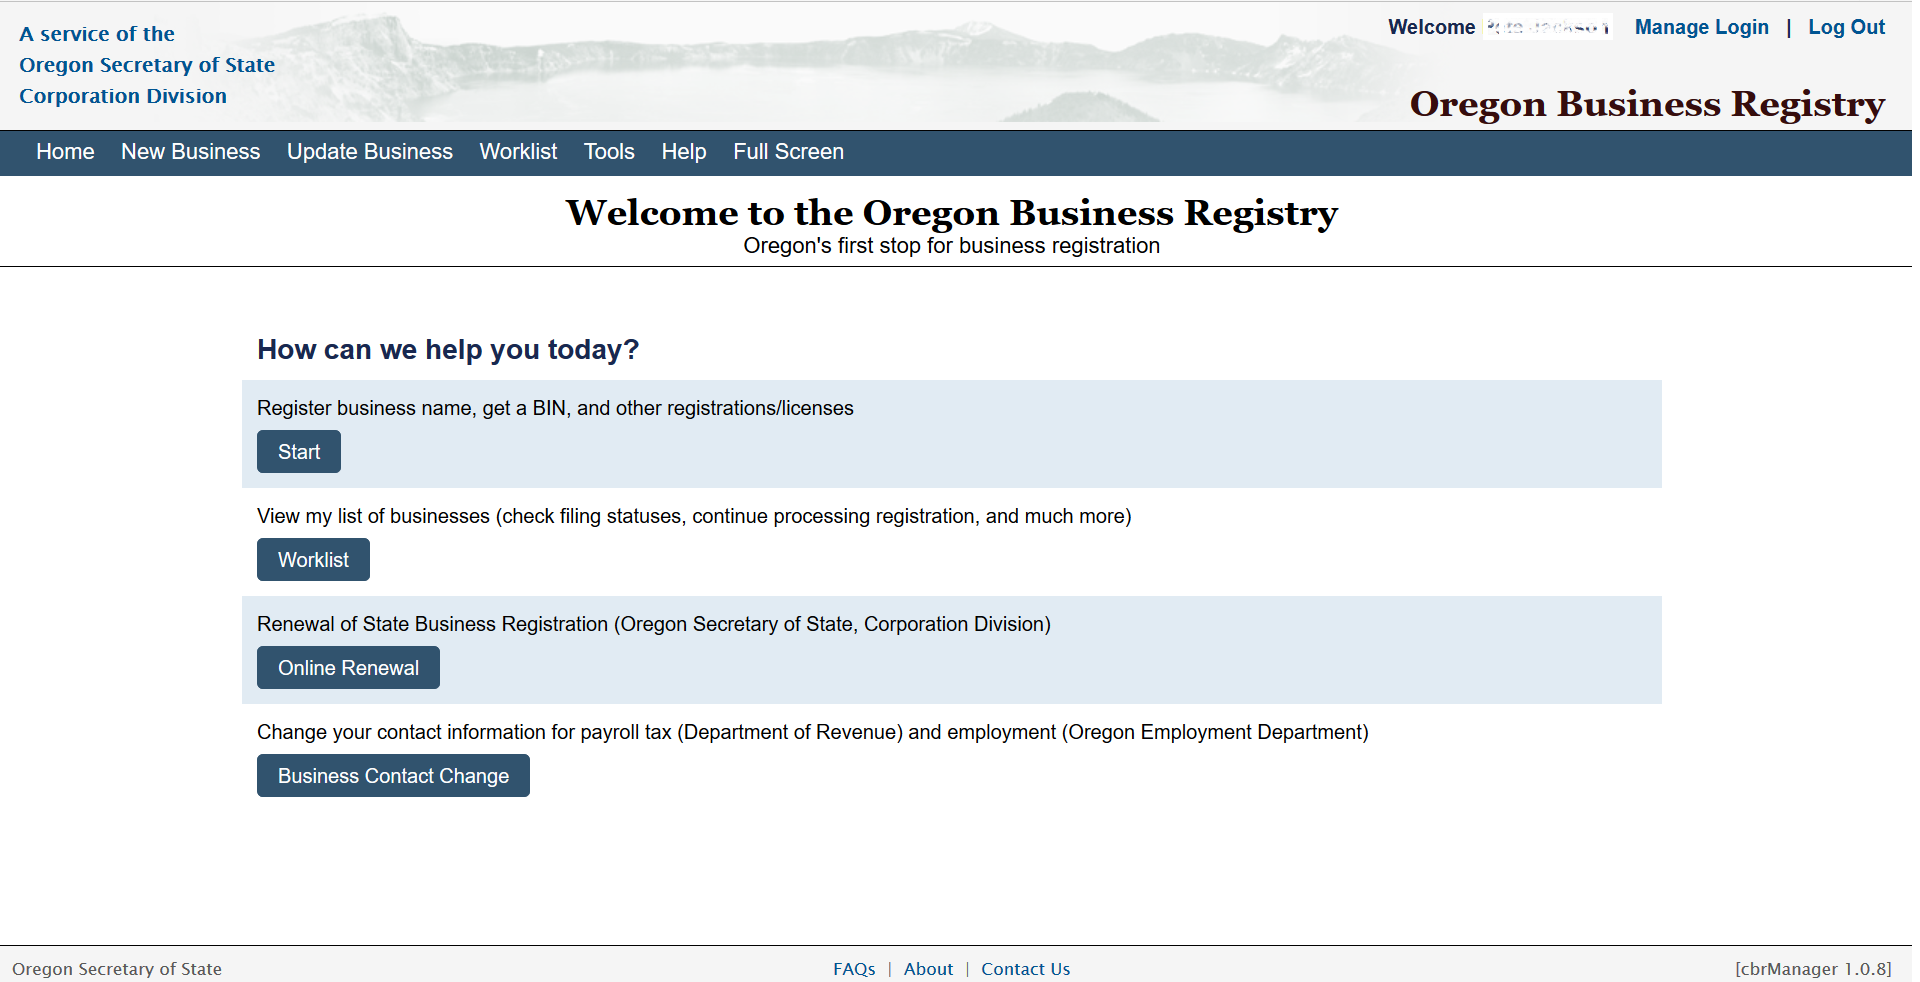
Step 3 – You will need to login to your account to access this area of the sight. Select the link labeled “Log In Here” to continue.
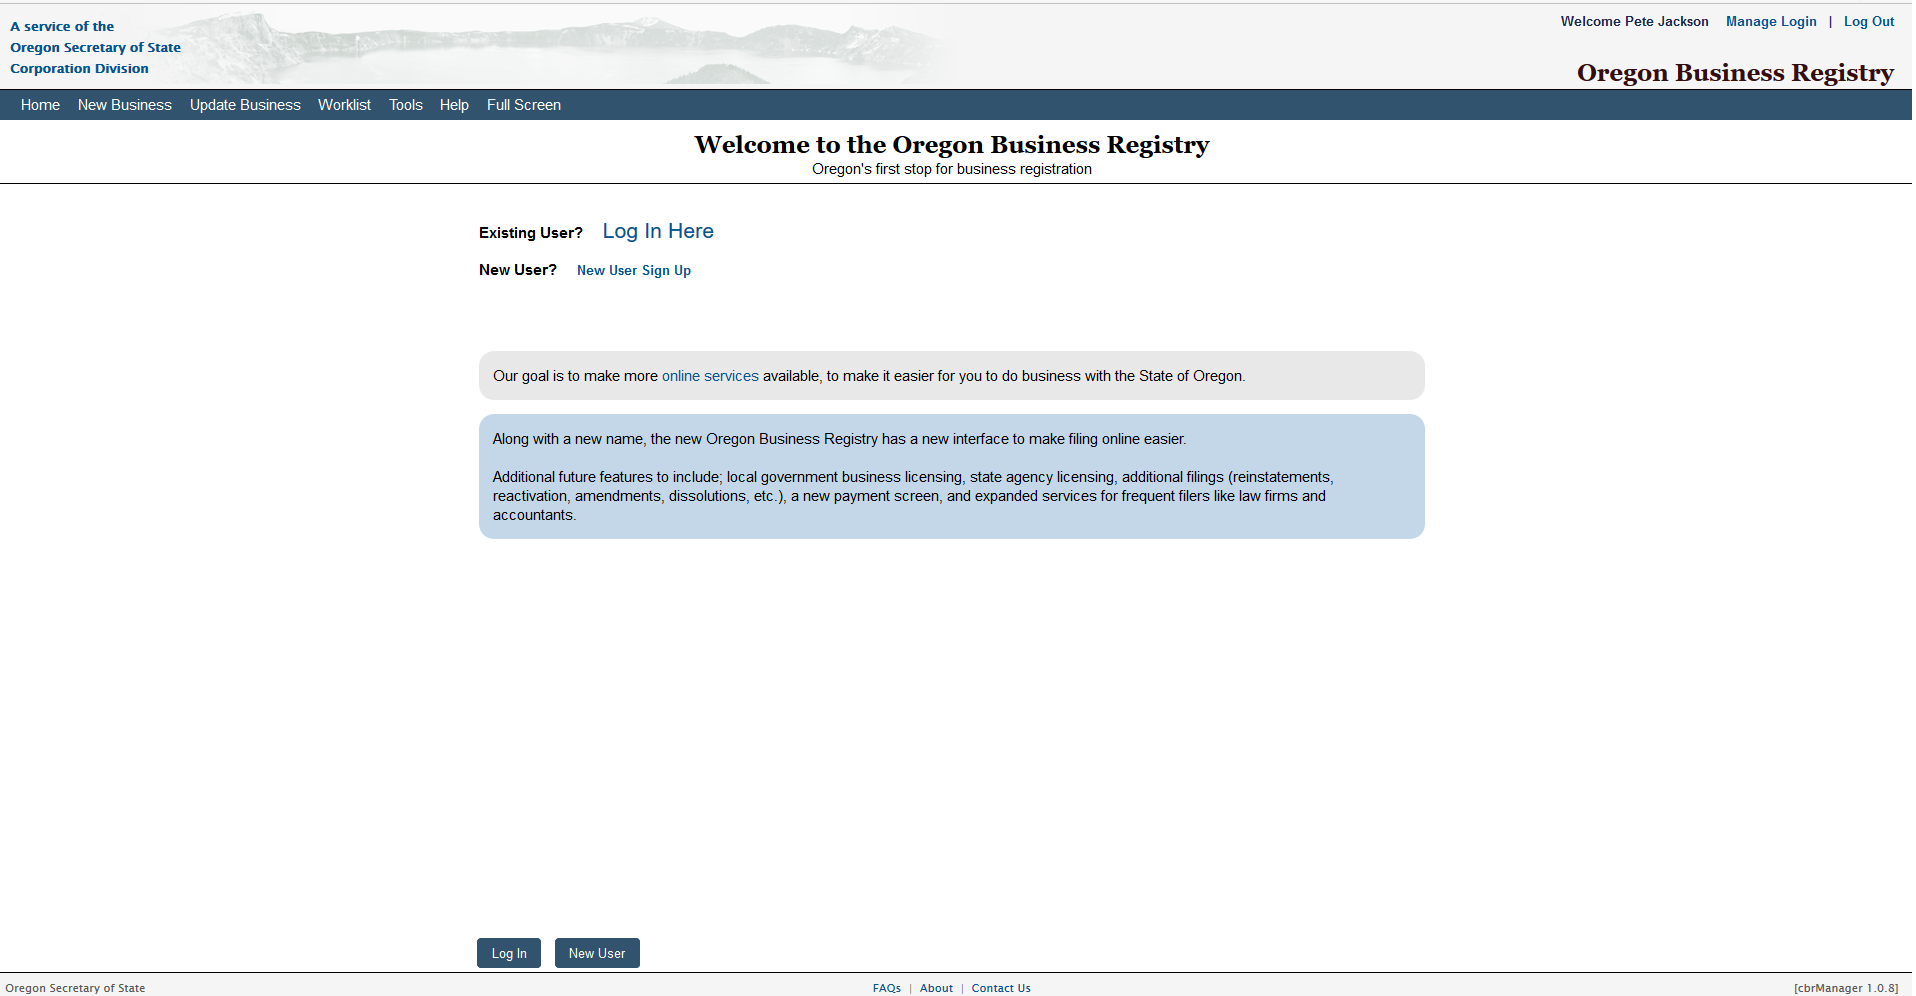
Step 4 – Enter your credentials, then select the “Login” button.
Step 5 – From the main area of the screen, select the button labeled “Start.”
Step 6 – Locate the button labeled “Register Name” then select it.
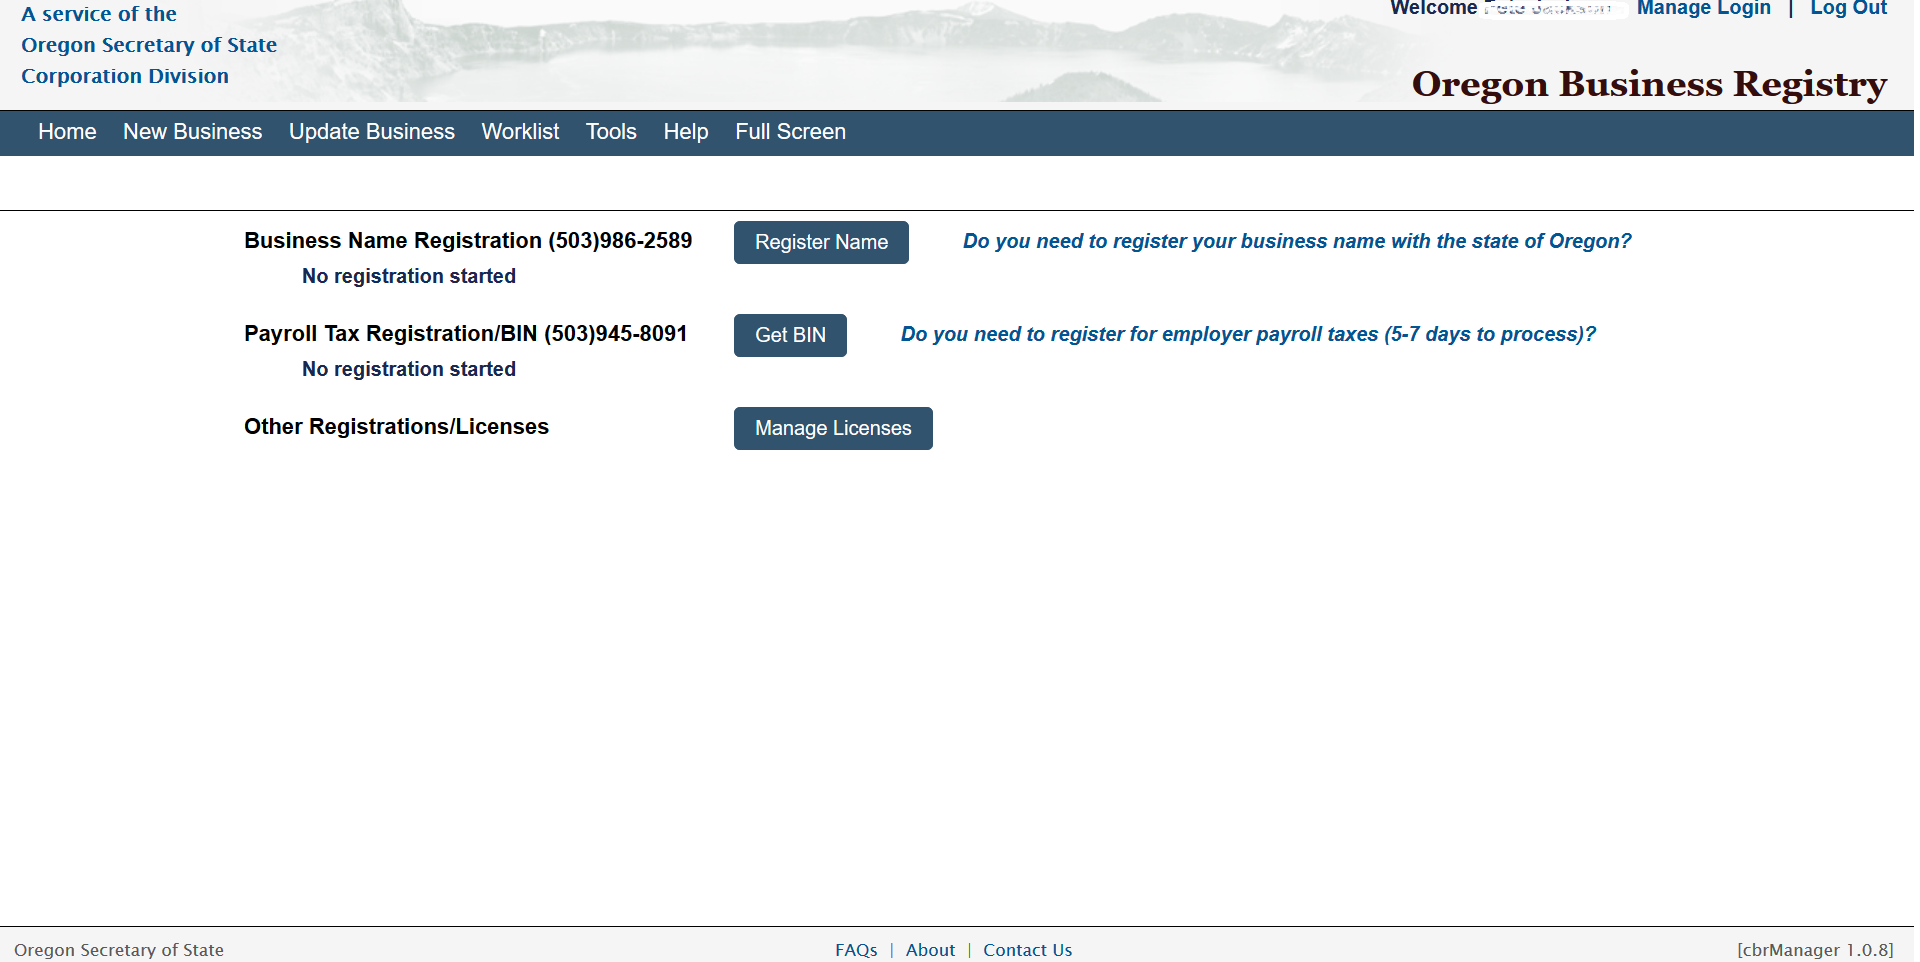
Step 7 – From the Drop Down list located on this page, select “Domestic Nonprofit Corporation.” This will automatically direct the browser to the first section of the online form.
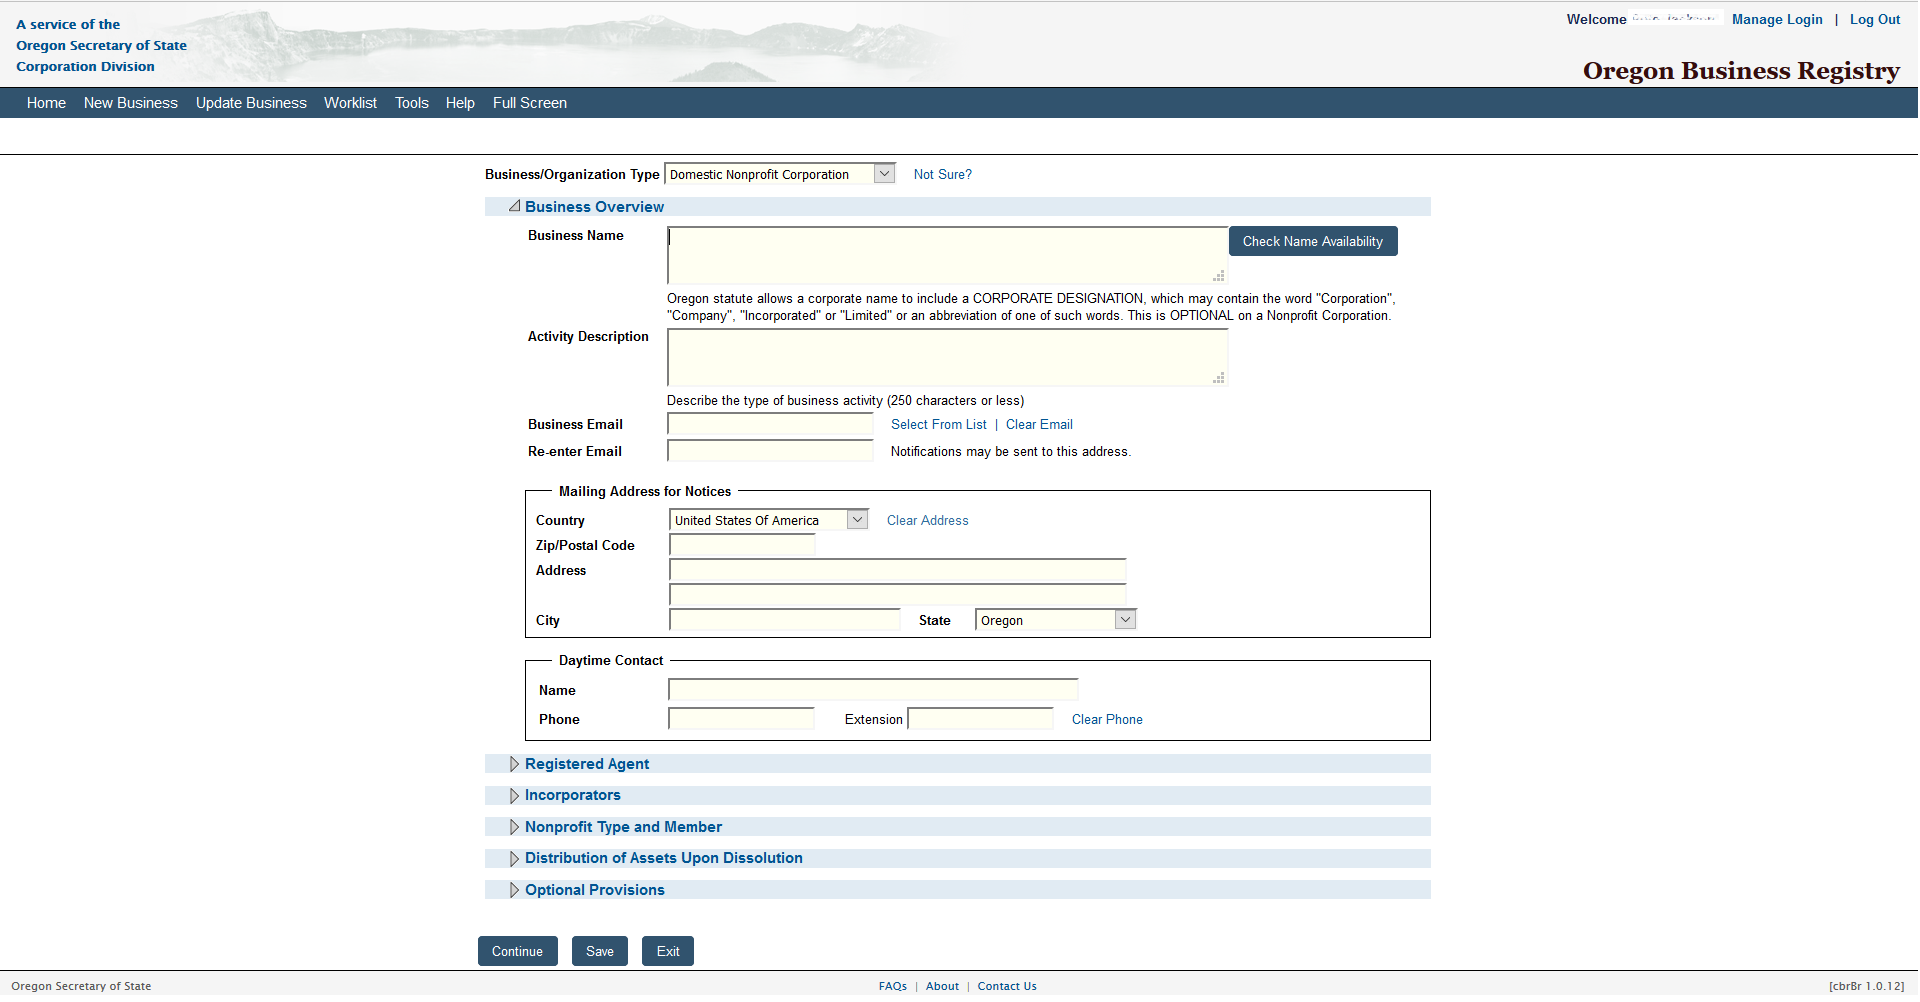
Step 8 – Enter the Full Name of the nonprofit corporation being formed in the field labeled Business Name then, select the button labeled “Check Name Availability.” This will open a new tab displaying the availability of the Name. When you have selected an available Name you may continue to the “Activity Description” text box.
Step 9 – In the “Activity Description” text box, you will have 250 characters to describe the purpose or nature of the nonprofit corporation.
Step 10 – Next, in the “Business Email” and “Re-Enter Email” fields, enter the where the Oregon Secretary of State may contact the forming corporation.
Step 11 – In the section labeled “Mailing Address for Notices,” you will need to report where the Oregon Secretary of State may send notices to the nonprofit corporation. First, select the Country of this address from the drop down menu, then enter the Zip Code in the “Zip/Postal Code” field, the Street Address in the “Address” field, the City in the “City” field, and select the State from the drop down list provided.
Step 12 – In the section labeled “Daytime Contact,” report the Full Name and Phone Number for an individual who may resolve any issues with this form the Oregon Secretary of State needs clarified. Once you have done this you may select the “Continue” button at the bottom of the page or select the link labeled “Registered Agent.”
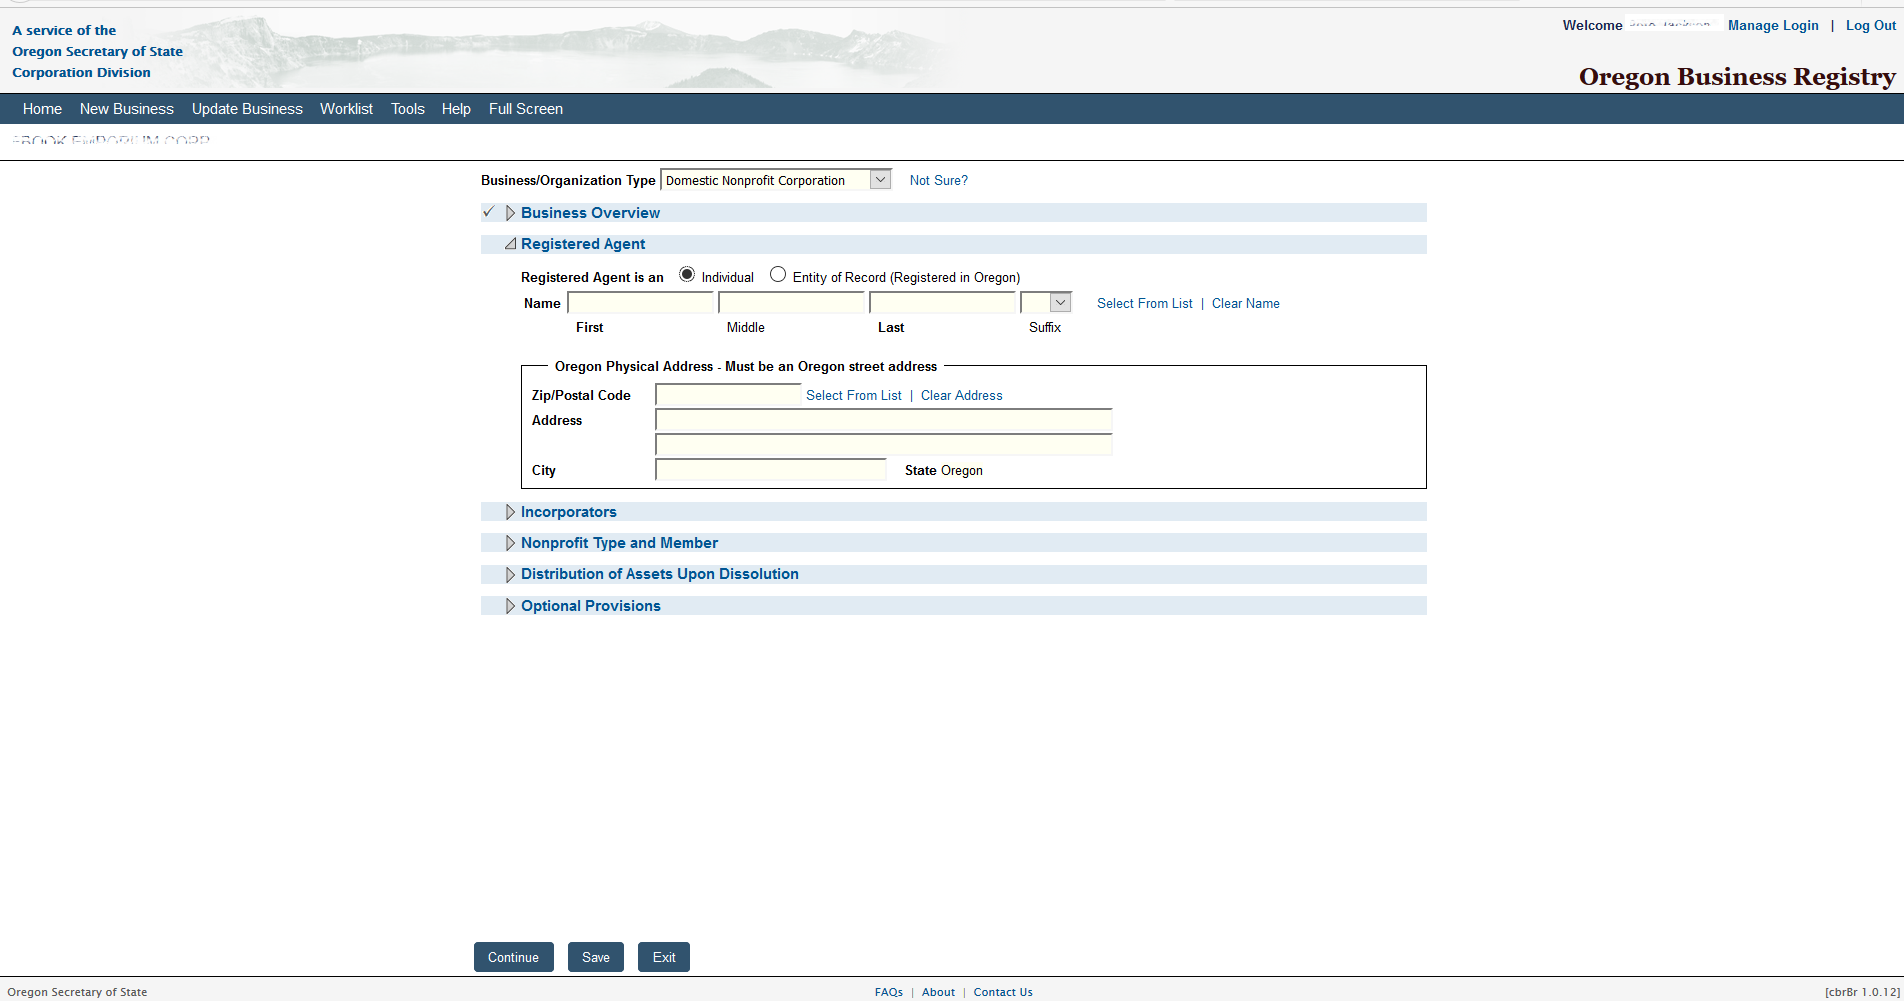
Step 13 – In the Registered Agent section, select the first radio button if the Registered Agent is an Individual or select the second radio button if it is an “Entity of Record.” Once you do this, several fields will appear. For our purposes select the first radio button.
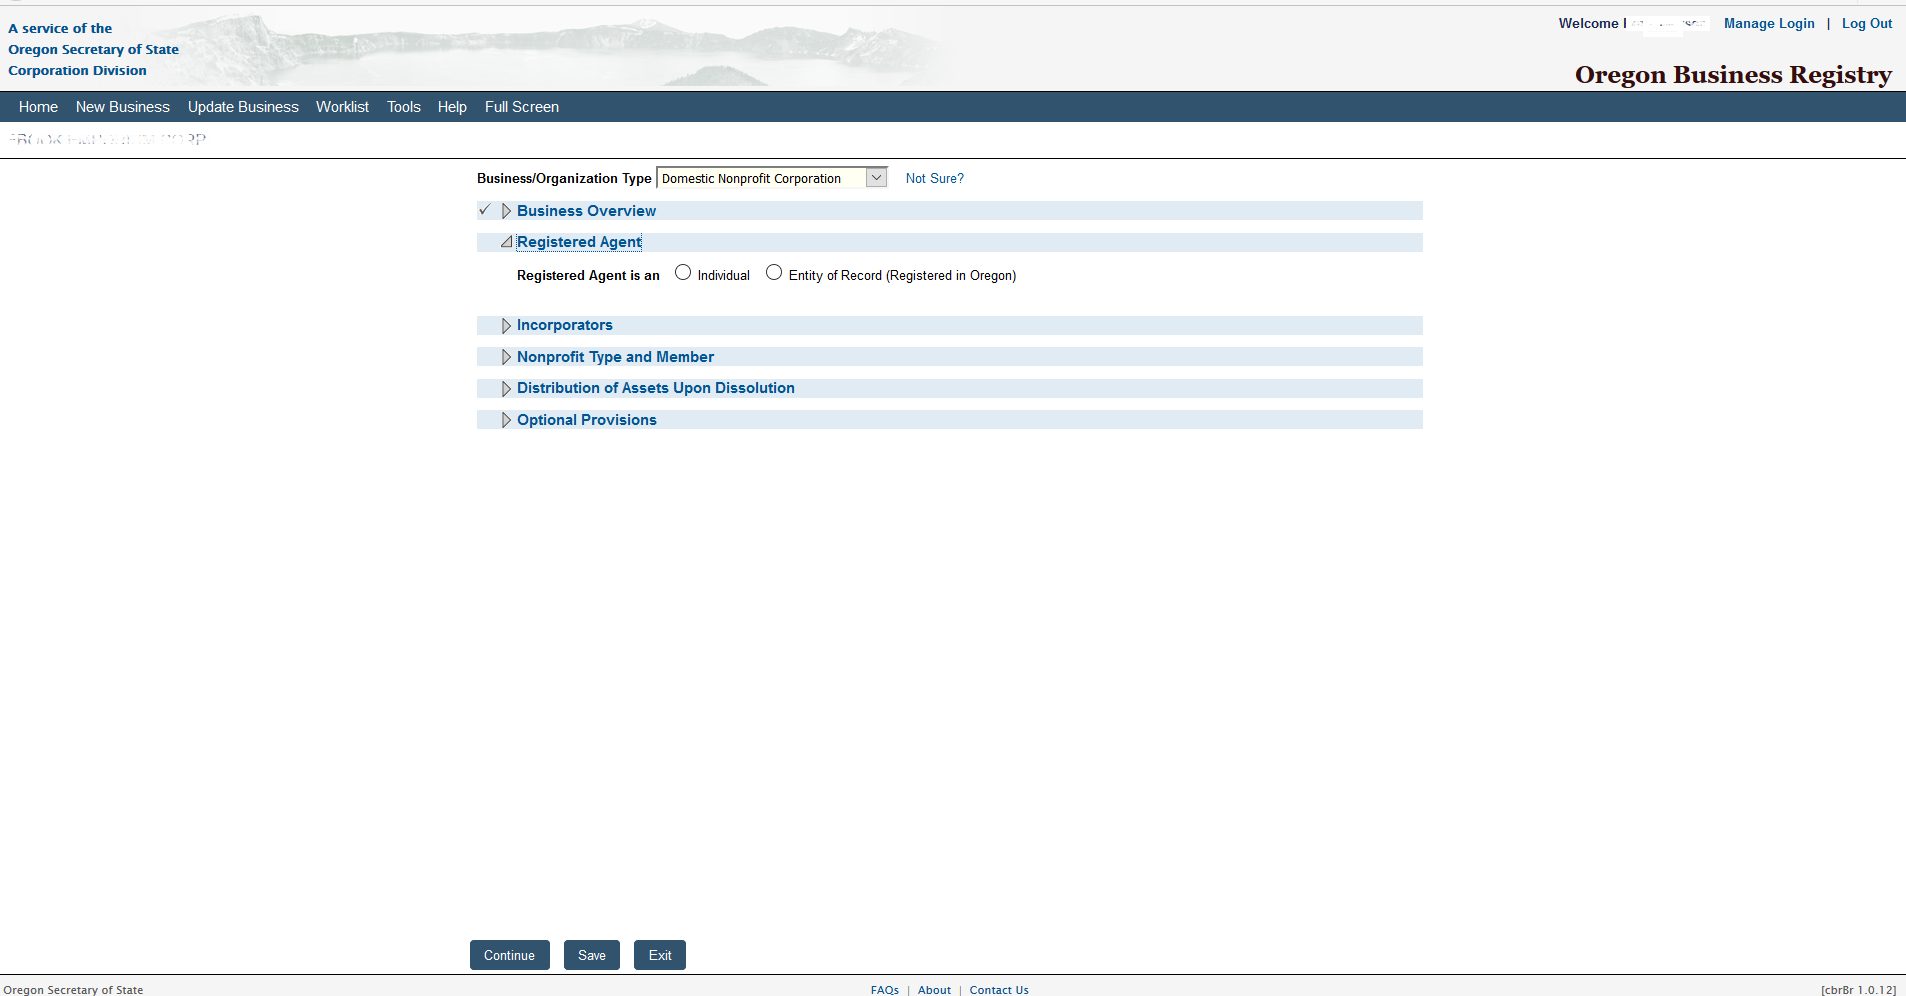
Step 14 – In the first area, labeled “Name,” use the fields provided to enter the Full Name of the Registered Agent. Then using the fields “Zip/Postal Code,” “Address,” and “City” report the Address of the Registered Agent’s Office. Once this is done, select the link labeled “Incorporators” or the button labeled “Continue.”
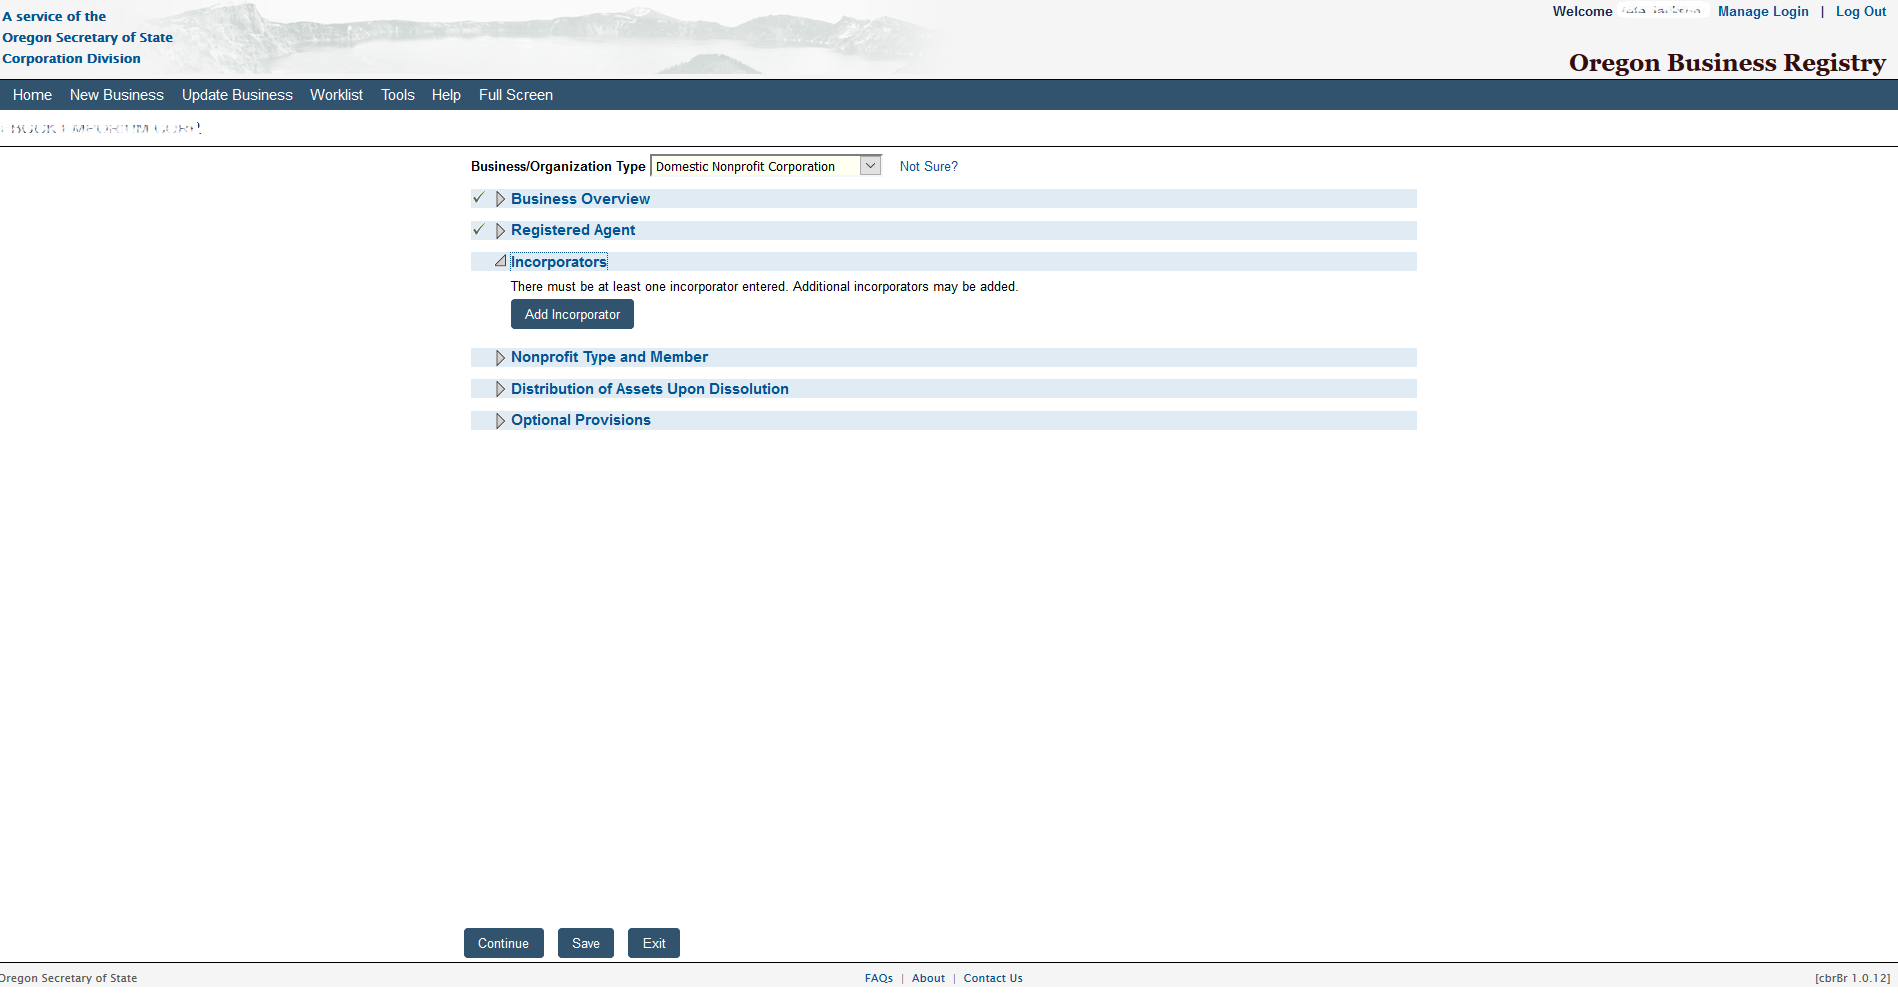
Step 15 – The next section will begin with a button labeled “Add Incorporator.” Select this button. This will generate a pop-up window.
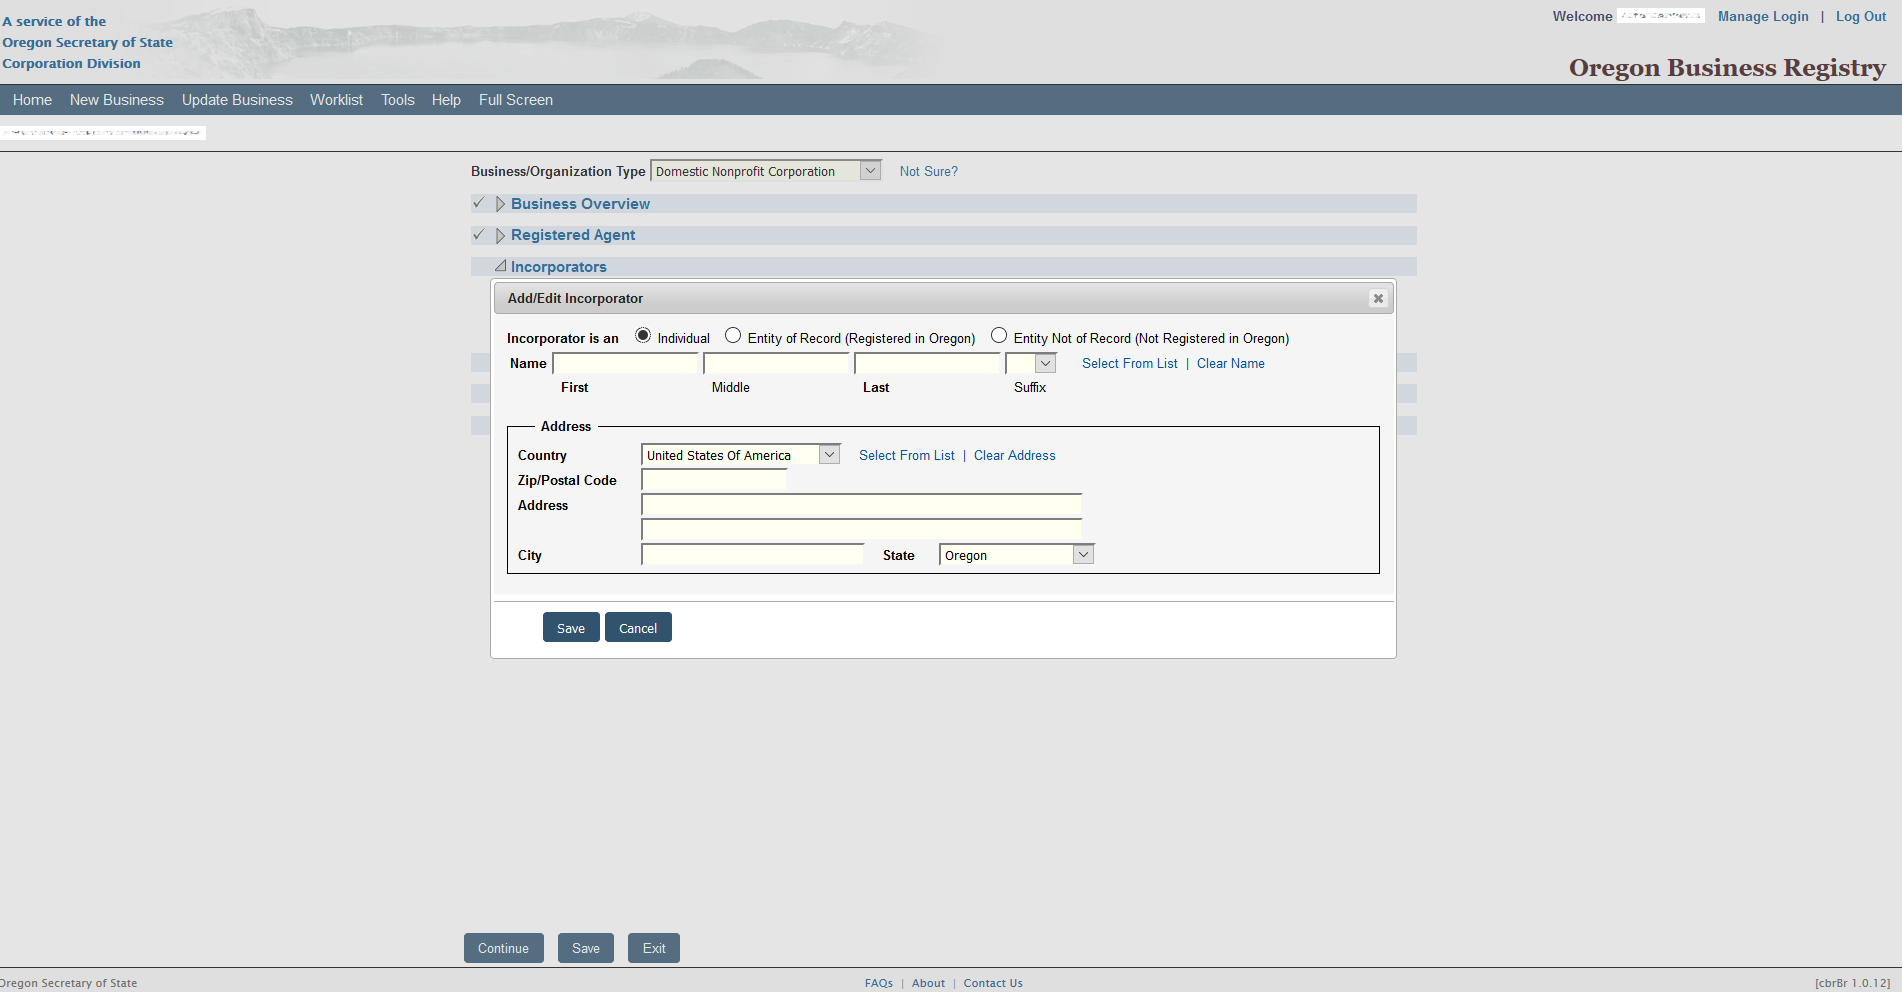
Step 16 – The Incorporator window will provide three radio buttons labeled “Individual,” “Entity of Record (Registered in Oregon),” and “Entity Not of Record (Not Registered in Oregon).” Select one of these to describe the entity type of the Incorporator you are about to enter. For our purposes, select the radio button labeled “Individual” Then enter the Full Name and Full Address of the Incorporator. Once you have done this, select the “Save” button.
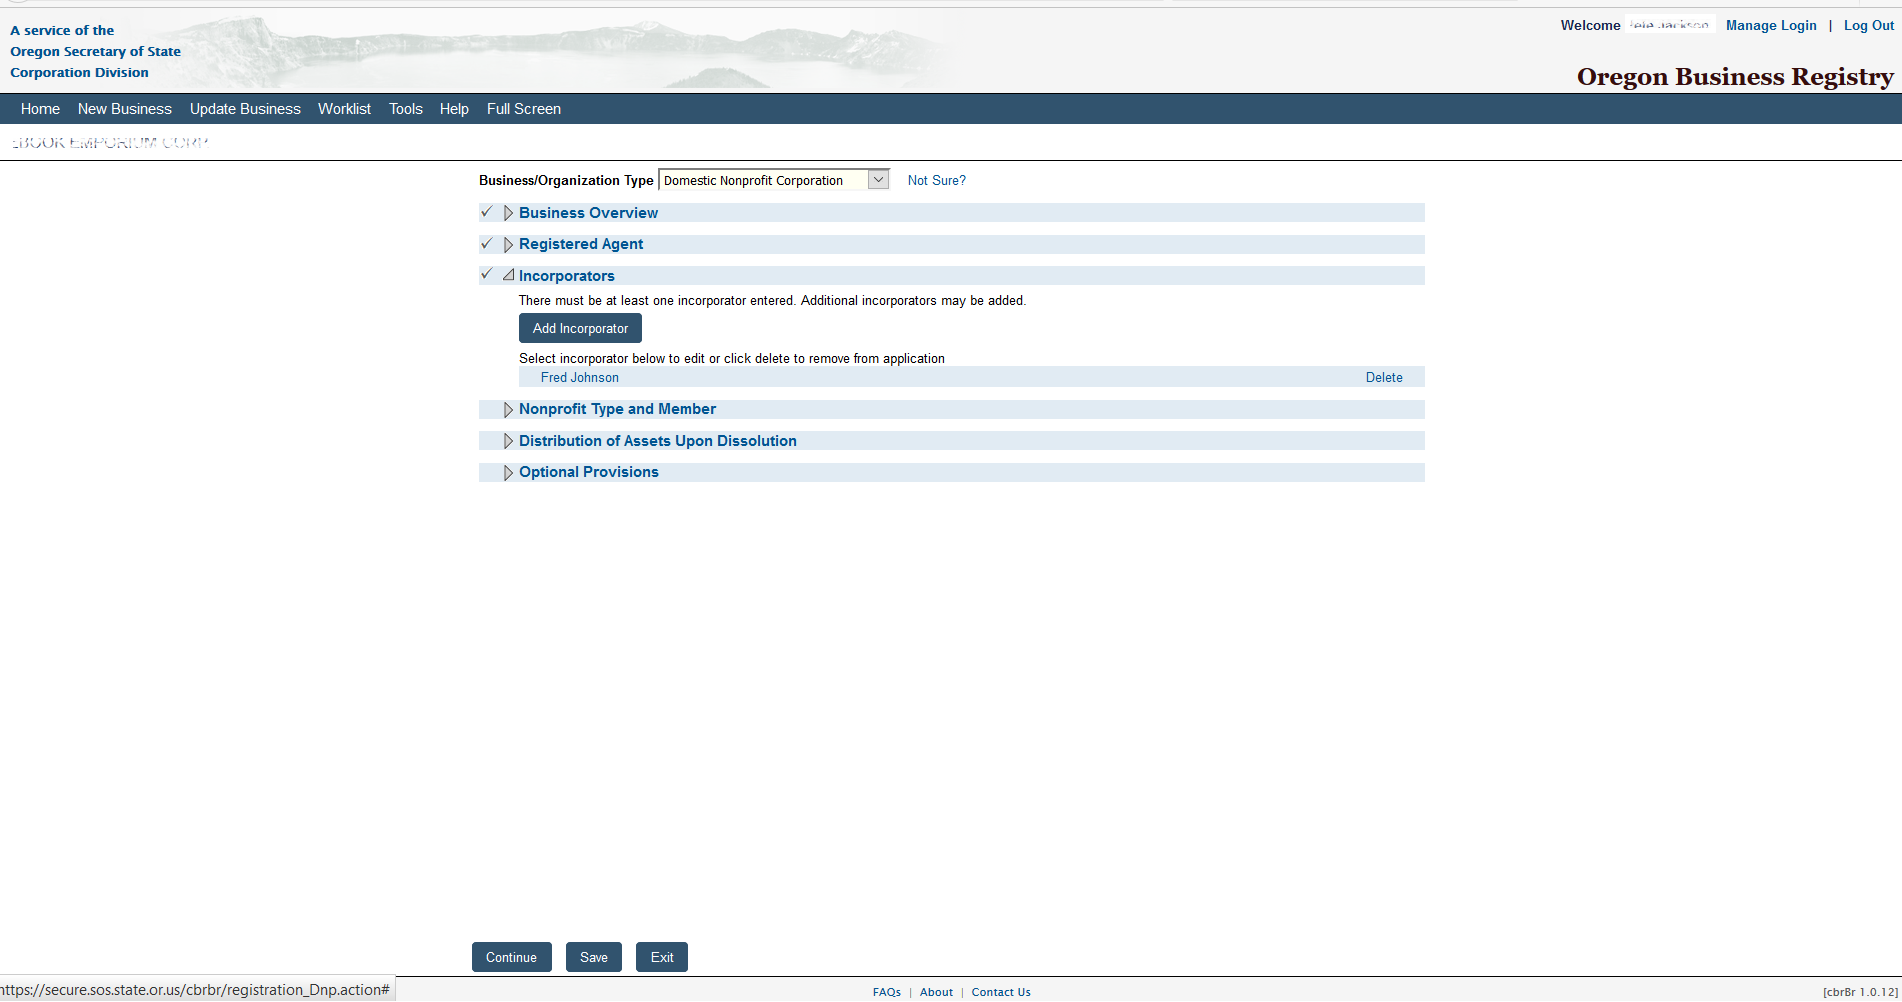
Step 17 – The Incorporator you have entered will be displayed for review. You may enter information for another Incorporator by selecting the “Add Incorporator” button. Once you have reported all Incorporators, you may select the link labeled “Nonprofit Type and Member” or select the “Continue” button.
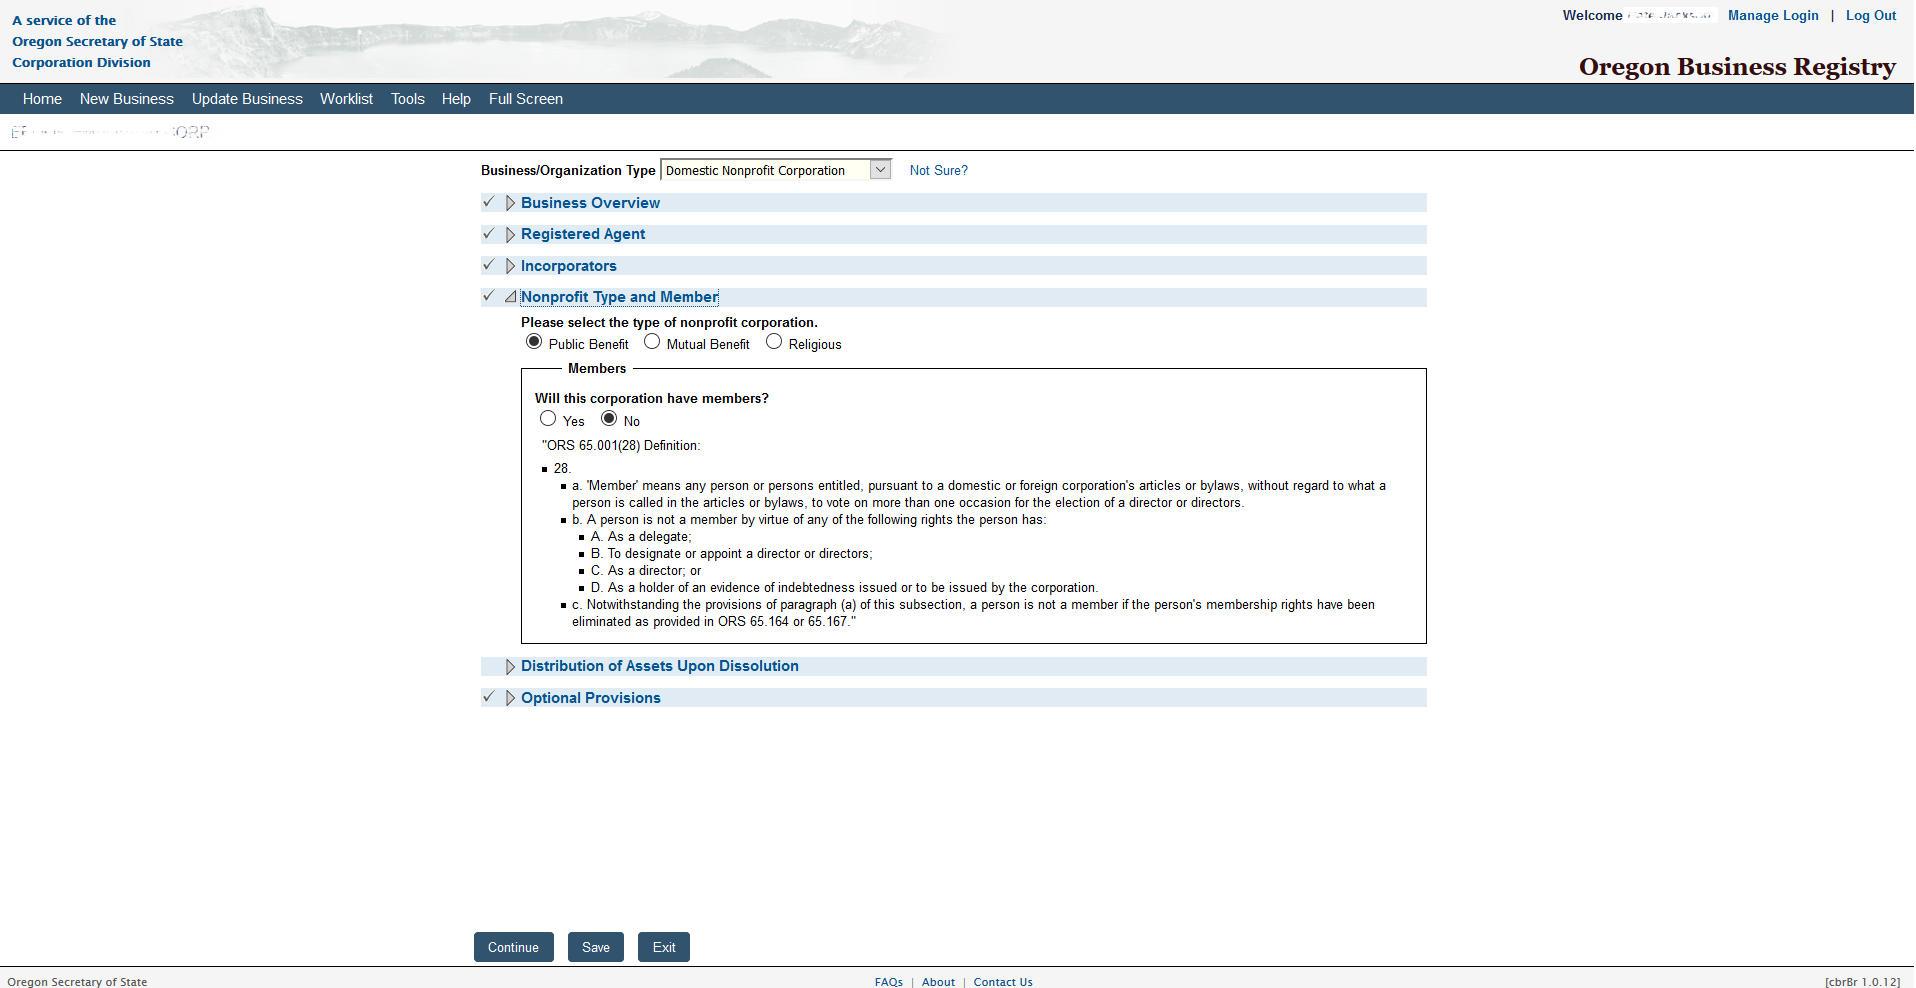
Step 18 – Next, you will need to further define the type of nonprofit being formed. You may choose only one radio button for the corresponding entity type. You may choose: Public Benefit, Mutual Benefit, or Religious. Choose one of these radio buttons.
Step 19 – Next, in the “Members” section, select the first radio button, labeled “Yes,” if this corporation will have members. If not, then select the radio button labeled “No.” For our purposes, select the “No” radio button. Once you have made these distinctions, either select the link labeled “Distribution of Assets Upon Dissolution” or select the button labeled “Continue.”
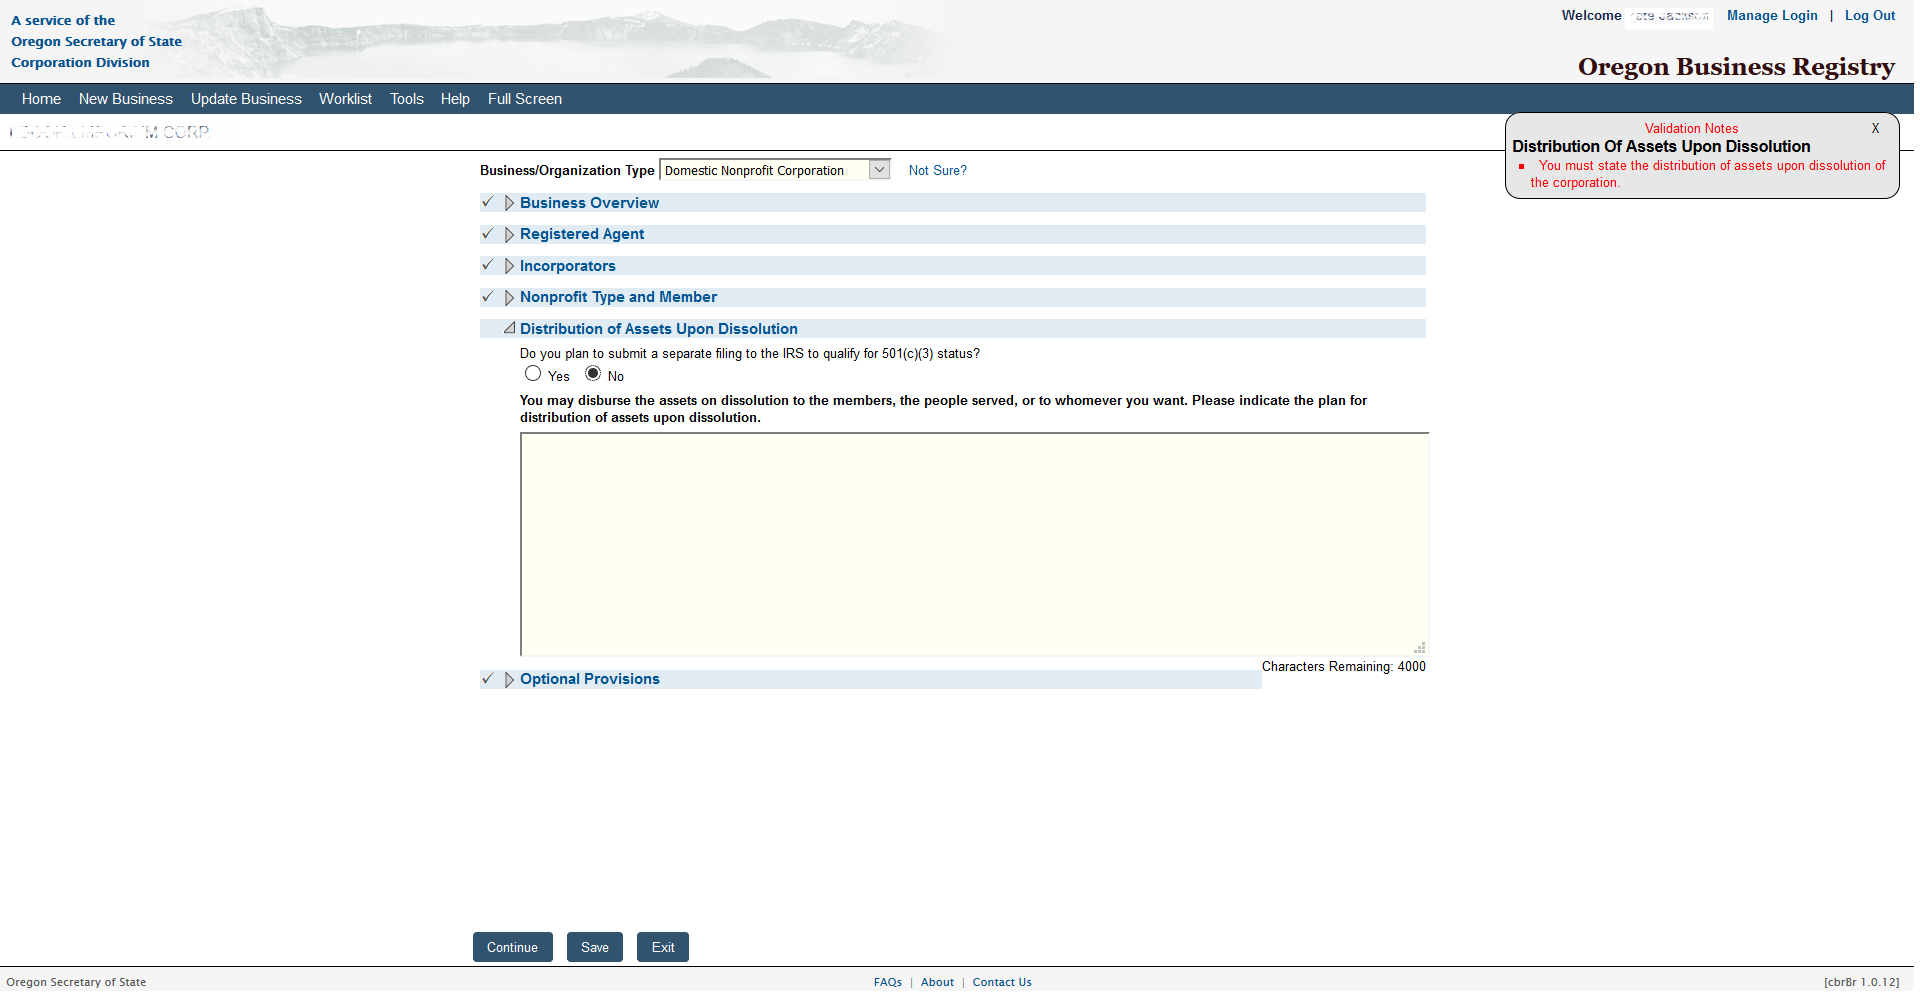
Step 20 – This section will have the question “Do you plan to submit a separate filing to the IRS to qualify for 501 (c)(3) status?” If so select the radio button labeled “Yes” and enter the conditions necessary for your entity type. For our purposes, select the radio button labeled “No.” You will need to enter additional information as to how the assets properties will be distributed or who will receive the assets and properties upon dissolution. Make the appropriate choice, then enter the necessary information. Once done, select the link labeled “Optional Provisions” or select the button labeled “Continue.”
Step 21 – In the “Optional Provisions” section, mark the check box if this corporation will indemnify its Officers, Directors, etc. according to ORS 65.387 to ORS 65.414. If there are any other provisions which must be stated then enter them in the text box provided (You will 4000 characters to do this with). Once you have finished with this page, select the button labeled “Continue.”
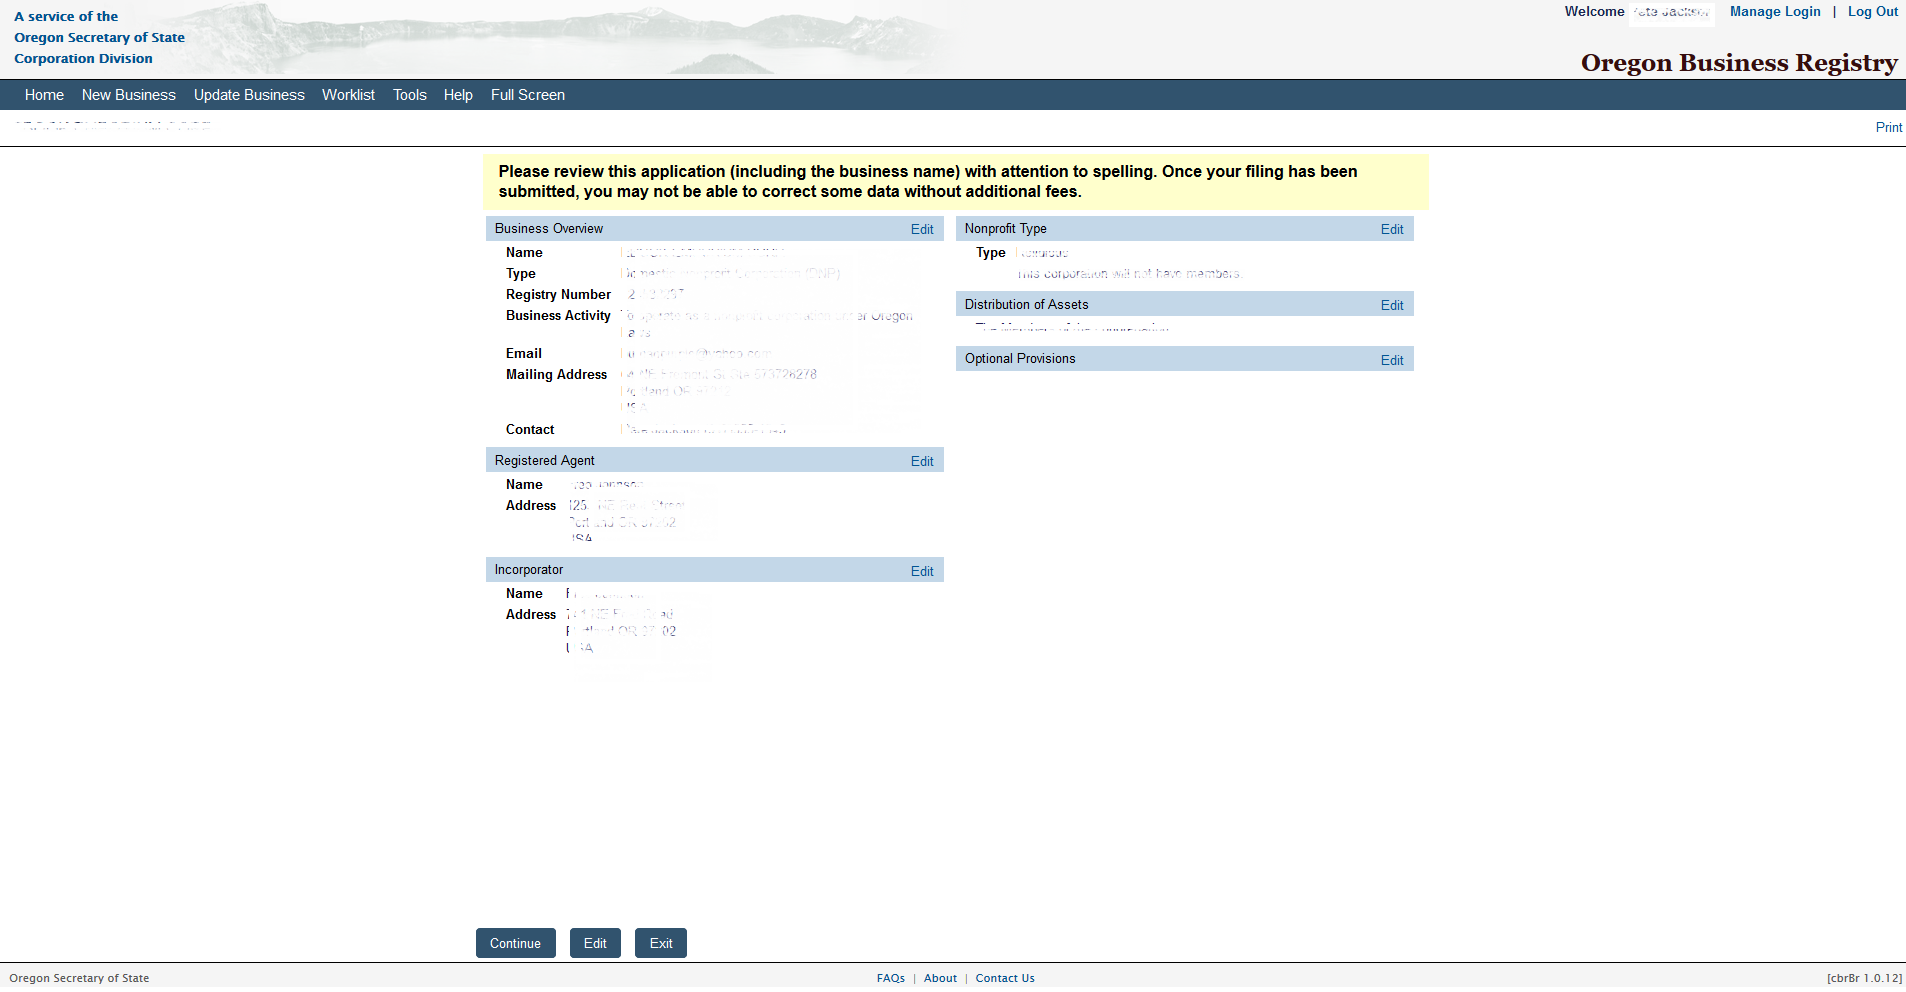
Step 22 – You now have the opportunity to review the information you have entered. This information must be correct, so if you need to correct anything, use the “Edit” button to navigate to that section and make your corrections. When this information looks accurate, select the “Continue” button. This will produce a pop up window that you must select “Yes” in to continue. This guides the browser to an area where you may enter your credit card information to pay the $50.00 Processing Fee required for this form.