|
Kansas Articles of Incorporation For Profit Corporation |
The Kansas Articles of Incorporation For Profit Corporation | Form CF 51-01 must be filled out then submitted to the Kansas Secretary of State when an entity wishes to incorporate in this state. Several basic requirements must be fulfilled when filing these. For instance the name of the corporation being formed must be a unique one and must contain a word of incorporation (i.e. Incorporated, Corporation, Company, Foundation, Church, College, Club, Union, University or acceptable abbreviations), which is appropriate for the type of corporation being formed. In addition to some of these basic requirements, other governing entities (such as the Internal Revenue Service) will express an interest by having a set of requirements authorized and in accordance with Kansas Legislature that corporations must satisfy when forming, then operating, in Kansas. Incorporators will need to take the initiative by seeking to satisfy all such additional requirements and are thus encouraged to seek appropriate professional counsel before starting a corporation. The first step in formation will start by gathering all relevant documents and/or provisions required to accompany the articles by the Kansas Secretary of State and the full payment of filing fees then submitting this package to Kansas Office of the Secretary of State, Memorial Hall 1st Floor, 120 S.W. 10th Avenue, Topeka KS 66612-1594. You may file by online as well but must an account with the Kansas Business Services Division (this may be done here: https://www.kansas.gov/user/login). When submitting by mail, the filing fee must be in the form of a check or money order ($90.00) and made payable to “Secretary of State.”
How To File
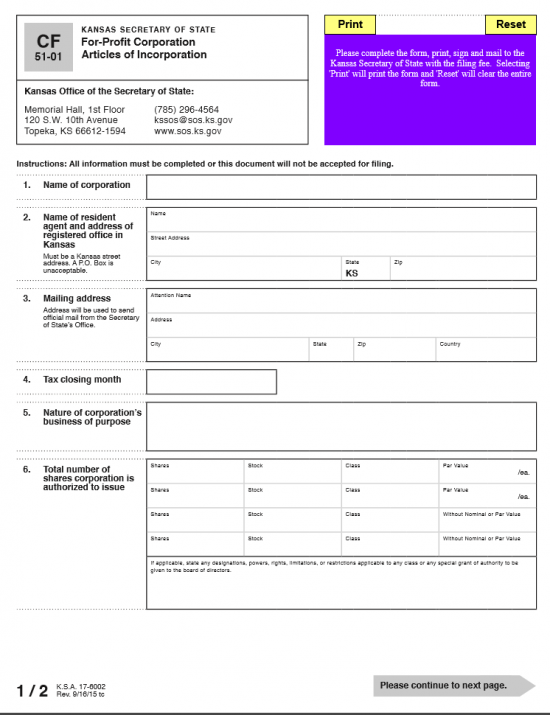
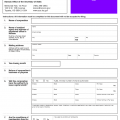
Step 1 – Download the Kansas For-Profit Corporation Articles of Incorporation here: Form CF 51-01
Step 2 – Enter the Full Name of the corporation in the box labeled “Name of Corporation.”
Step 3 – The “Name of Resident Agent and address of registered office in Kansas” will provide three rows to report on the identity and location of the Registered Agent who has been appointed by this entity to receive service of process on its behalf in the event it is sued. This party may be an individual (over the age of 18) or a corporation other than the forming entity. In the first row, enter the Full Name of the Registered Agent.
Step 4 – In the second row, enter the Physical Street Address where the Registered Agent is Located. The third row will require the City and Zip Code to be entered. The state is filled in because the Registered Agent must be located in Kansas.
Step 5 – In the “Mailing Address” article, enter the address the Secretary of State may use to mail official documents to the forming corporation. There will be three rows provided. The first will require the Attention Name for the corporation’s contact with the Secretary of State. On the second and third row, enter the Street Address, City, State, Zip Code, and County.
Step 6 – In “Tax Closing Month,” document the tax closing month for this corporation.
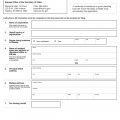
Step 7 – The “Nature of corporation’s business of purpose” requires the reason for starting this business along with the way it shall operate or transact business in this state.
Step 8 – The “Total Number of shares corporation is authorized to issue” will provide a table to report on stock information. You may report on two types of shares, with par value and without nominal or par value. In the first two rows you may report the number of shares and stock for each class then, the par value of each share. On the last two rows report the number of shares and stock for each class without nominal or par value. There will be a box below this to report on any special designations, priveleges, or restrictions etc. for any applciable classes.
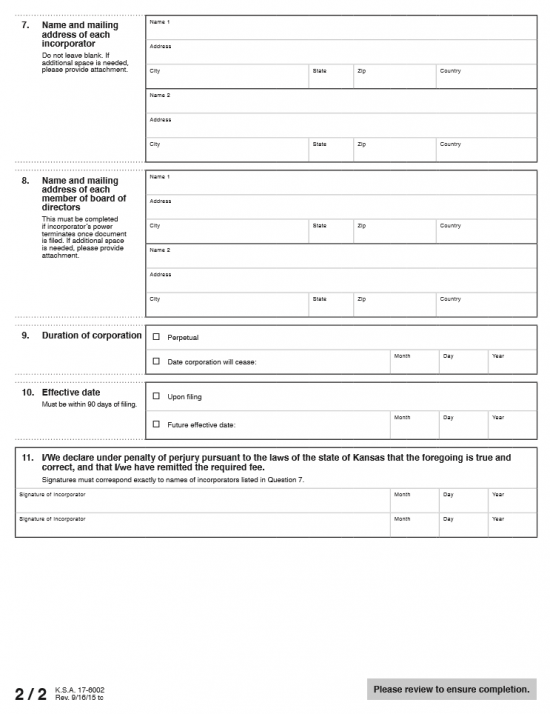
Step 9 – All Incorporators should be reported in “Name and Mailing address of each incorporator.” Each Incorporator’s Full Name and Full Address should be reported. If there is not enough room, you may attach a separate sheet of paper.
Step 10 – The “Name and mailing address of each member of board of directors” must be filled out if the Incorporator’s power is nullified once these articles have been successfully filed. There will be enough room to report two directors. Each one will have the first row for his/her Full Names and the second two rows for the Mailing Address.
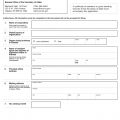
Step 11 – The “Duration of corporation” will define the lifetime the corporation is active and conducting business. If there is no date set for the termination of this corporation then mark the box labeled “Perpetual.” If there is a date set for which this corporation’s activity and/or existence shall cease then mark the second box and enter this date on the second row. There will be a separate box for Month, Day, and Year.
Step 12 – The “Effective Date” will name when this corporation may legally conduct business and become an active corporation. If this is upon filing, then mark the first box (labeled “Upon filing”). If a specific date (within ninety days of the filing date) then mark the second box and enter the Month, Day, and Year this corporation must become active.
Step 13 – The last section shall be the signature line. All Incorporators officially reported in the Incorporator name and address section must provide his/her signature along with a date for this signature.
Step 14 – Now that all information has been entered and verified as true, you may gather the Kansas For-Profit Corporation Articles of Incorporation, all attachments, and a check or money order for the full filing fee amount ($90.00) made payable to “Secretary of State” then mail to:
Kansas Office of the Secretary of State
Memorial Hall 1st Floor, 120 S.W. 10th Avenue
Topeka KS 66612-1594
How To File Electronically
Step 1 – Go to http://kssos.org/, then select the menu option “Business Filing Center” near the top right hand corner of the page. Then, from the drop down menu that appears, select “Business Entity Filings” under “Business Entity Filings.”
Step 2 – Under the “Business Entities” heading, select the link labeled “File Formation Documents (for example Articles).”
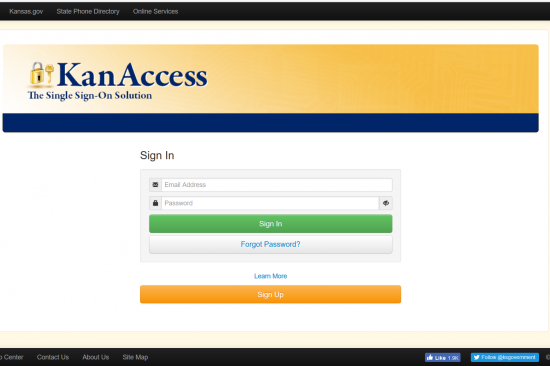
Step 3 – Provide the Email Address and Password for your KanAccess account.
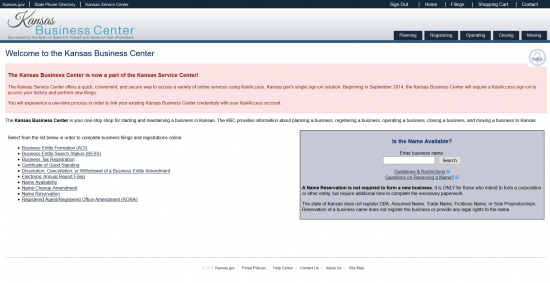
Step 4 – From this page, select the link labeled “Business Entity Formation (AOI)” from the links in the bottom left hand portion of the page.
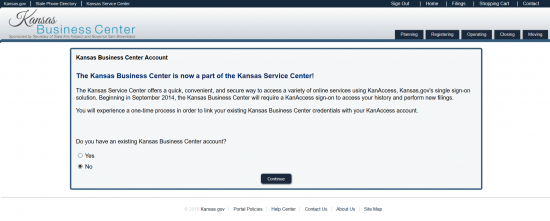
 Step 5 – Recently KanAccess and Kansas Business Center have linked together. If you have a Kansas Business Center Account select the radio button labeled “Yes.” If you do not have a Kansas Business Center Account, select the radio button labeled “No.” For our purposes, select the radio button labeled “No” then select the button labeled “Continue”
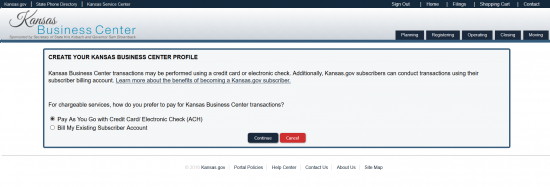
 Step 6 – You may elect to have your filings paid for in one of two ways. If you would like to “Pay as you go” with a credit card or ACH account, select the first radio button then select the word “Continue.” If you would like to have an Existing Account billed select the second radio button then select the button labeled “Continue.”
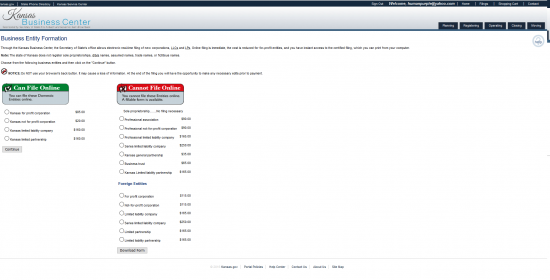
 Step 7 – You may only file two corporation types online: domestic profit and domestic nonprofit corporation. Select the radio button labeled “Kansas for profit corporation $85.00” (in the left column) then select the button “Continue” below this list.
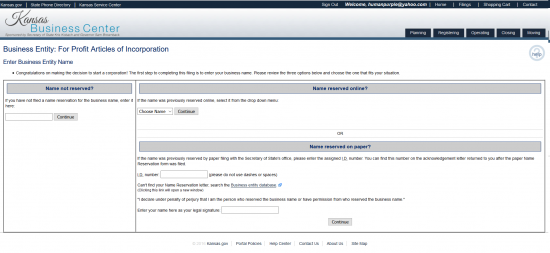
 Step 8 – Assuming you do not have a Reserved Name, enter the Name you wish to give your corporation in the text box under the heading “Name not reserved?” then select the button labeled “Continue” (make sure you include a word or suffix of incorporation).
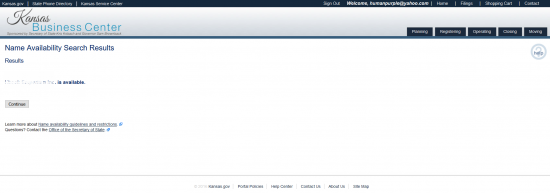
Step 9 – If the Name is available you will be directed to a page stating this (otherwise you will have to try again).
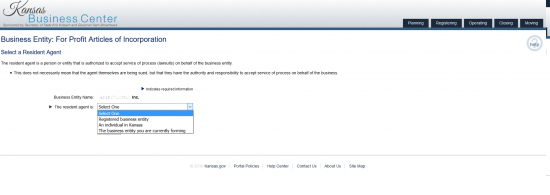
 Step 10 – Indicate the type of Resident Agent you have obtained for your corporation from the choices available. You may choose the entity type from the drop down menu labeled “The Resident Agent is.” You may select Registered Business Entity, An Individual in Kansas, or the Business Entity You Are Currently Forming. You will have to enter the Identity of the Resident Agent if not your company. If you have obtained a business entity, you will have to enter the Name of this entity on the next page exactly as it appears before continuing. If you choose your own entity, you will be asked to confirm this on the next page. For our purposes, select “An Individual in Kansas.” Select the “Continue” button after making your selection.
 Step 11 – On this page, enter the First Name, Middle Name (if applicable), Last Name, and Suffix (if applicable) of your Resident Agent in the boxes provided. Then select the “Continue” button. You may also go back by selecting the “Change Resident Agent” button.
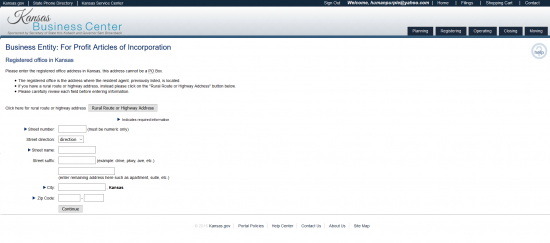
 Step 12 – Next you must enter the Street Number, Street Direction (select from drop down list), Street Name, Street Suffix (such as Avenue), any applicable Unit Number, City, and Zip Code of your Resident Agent.
 Step 13 – The next screen will ask if the Resident Agent has a separate address, if so then choose the radio button labeled as “An alternate address.” If this is the case you will need to enter the separate Mailing Address for your Resident Agent. For our purposes, select the radio button labeled “The registered office address previously listed” then select the button labeled “Continue.”
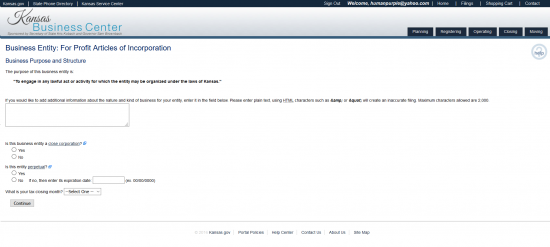
 Step 14 – In this next page, the Purpose of this corporation will be defined. The default will be a generic statement however, if you need to add anything specific you may do so in the large text box provided.
Step 15 – Below the purpose section, indicate if this is a Close Corporation or not. If so, mark the radio button labeled “Yes,” if not mark the radio button labeled “No.”
Step 16 – Next you must report on the lifespan of this corporation. If this corporation intends on operating indefinitely, select the radio button labeled “Yes.” If not, then select the radio button labeled “No” and enter the Expiration Date in the text field provided (mm/dd/yyyy).
Step 17 – Next select your Tax Closing month from the drop down menu. Once this is done select the button labeled “Continue.”
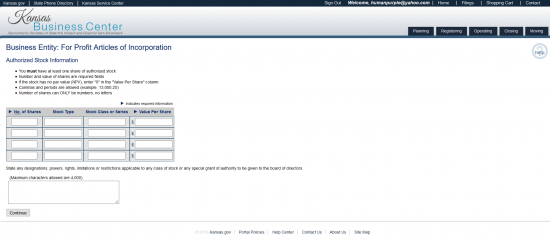
 Step 18 – Next, you must provide the Authorized Stock information. There will be a table provided for this effort. Enter the Total Number of Shares for each Stock Type then the Class/Series of that stock and its Par Value or Value Per Share in the rows provided. Report any powers, rights, limitations for each type in the text box provided at the bottom of the page then select the “Continue” button.
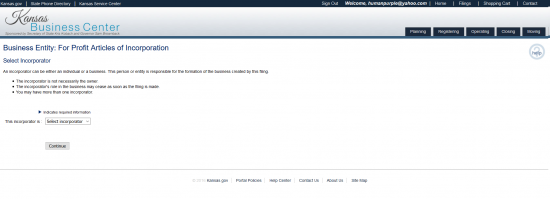
Step 19 – Next you must enter the Incorporator information. This will begin by selecting the type of Incorporator from a drop down menu. You may select either “An Individual” or “A Business.” For our purposes select “An Individual” then click on the “Continue” button.
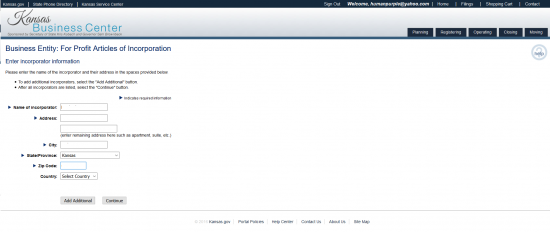
Step 20 – Enter the Name of the Incorporator in the first text field, the Address of the Incorporator in the second text field (the third is optional), the City of the Incorporator in the fourth text field, the State of the Incorporator from a drop down menu, the Zip Code of the Incorporator in the sixth text field, and the Country from the last field (drop down menu). You may choose “Continue” if there is only one Incorporator or you may choose “Add Additional” (if there are more than one). For our purposes, select “Continue.”
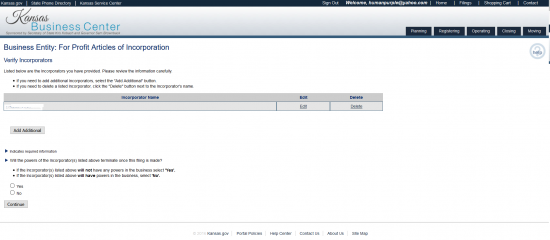
Step 21 – The next page will provide a table of the Incorporators you have reported. Each row will contain the Name of the Incorporator you have entered, a chance to edit this information using an “Edit” button, or the opportunity to delete the Incorporator using a “Delete” button. You may also choose “Add Additional” if you wish to add another party to this list. Make sure this list is complete and accurate.
Step 22 – Below the Incorporator table, indicate if the Incorporator’s powers of business cease upon formation. If so, select the radio button labeled “Yes” then the “Continue” button. If not, then select the “No” radio button and select “Continue.”
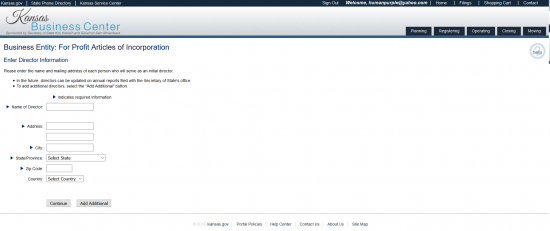
 Step 23 – Next you must provide a list of Directors. Enter, in this order, the Name of the Director, the Address of the Director, the City, State, and Zip Code of the Director, and the Country of the Director. You may choose to “Continue” if you are only reporting one or you may choose the button labeled “Add Additional” if there are more than one.
 Step 24 – The Directors will now be displayed in a table. You may choose to “Edit” or “Delete” each one in the table. Below the table you may choose to “Add Another” or you may choose to “Continue.” When you have finished this list, select “Continue.”
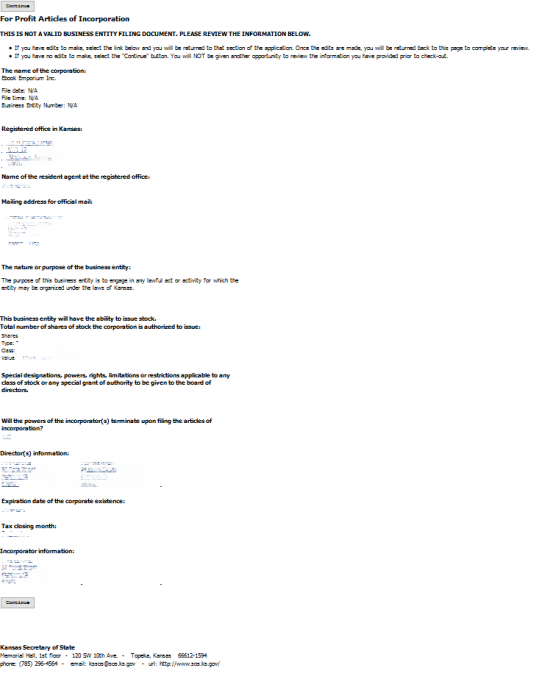
 Step 25 – You will now have an opportunity to view a preview of what you are about to submit. Read the paragraph then select the button labeled “Show Preview.”
 Step 26 – Review the information you have entered carefully. Each entry you have made will be displayed as a link back to that page. Use this to navigate if you have to edit anything. Do not use the back button on your browser. If all the information is correct, select the button labeled “Continue” at the bottom of the page.
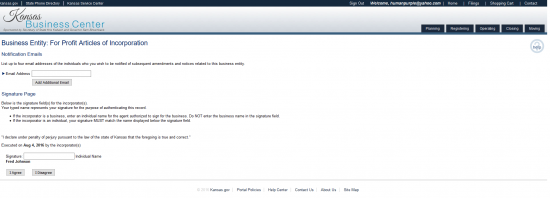
 Step 27 – Next, you must enter an Email Address where you may receive notifications concerning this forming entity. You may add up to four email addresses (use the “Add Additional Email Address” button to do this). Then you must provide your electronic signature in the last text field. This will bind you to what you are about to submit. Once this is done, select “Submit.” Once this is done, you will be directed to the payment page where you will need to pay the $85.00 Filing Fee by entering your credit card or ACH information.
