|
Oklahoma Certificate of Incorporation Not for Profit Corporation |
The Oklahoma Certificate of Incorporation Not for Profit Corporation will need to be filled out completely then filed with the Oklahoma Secretary of State whenever an entity wishes to operate as a Nonprofit corporation in this state. This document will not grant Tax-Exempt Status, only the I.R.S. may do that, but it does satisfy the registration requirements placed upon forming nonprofits in this state. If the nonprofit being created will apply for Tax-Exempt Status, the Incorporators should contact the I.R.S. prior to filling out this form as specific language will likely be necessary to be included within these articles.
You may file these articles either by mail or electronically. If filing by mail (Secretary of State, Business Services, Colcord Center, 421 NW 13th Street, Suite 210/220, Oklahoma City, OK 73103), you will need to include a check in the amount of $25.00 made payable to “Secretary of State.” If filing electronically (at: https://www.sos.ok.gov/business/default.aspx), you may pay with a credit card.
How To File By Mail
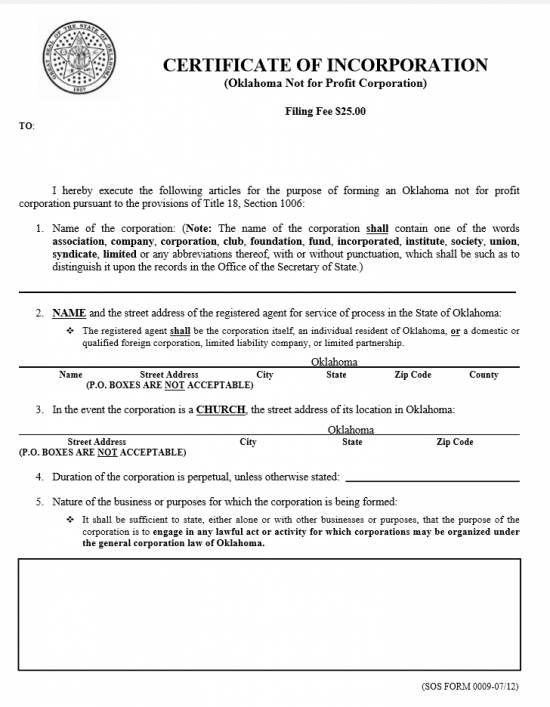
Step 1 – Download the Oklahoma Certificate of Incorporation Not for Profit Corporation by selecting the “Download Form” link above or by clicking here: SOS Form 0008. You may use a PDF program to fill this document out or you may print it then fill it out. Note: If there is not enough room provided to report the required information, you may continue on a separate document that is clearly labeled then attached.
Step 2 – In Article 1, document the Full Name of the nonprofit corporation being formed.
Step 3 – In Article 2, use the blank line provided to document the Full Name of the Registered Agent then the Full Street Address, the City, Zip Code, and County where the Registered Agent is physically located.
Step 4 – Article 3 will require attention if the nonprofit being formed is a church. If so report the Physical Address of the Church in Oklahoma.
Step 5 – Article 4 will require attention regarding the lifespan of this nonprofit corporation. If left blank, it will be assumed the nonprofit corporation intends to operate indefinitely. If there is a specific lifetime for this corporation then enter the number of years this corporation shall be active.
Step 6 – In Article 5, report the Purpose of this corporation. You may be very specific and/or give a somewhat generalized statement such as “to engage in any lawful act or activity for which corporations may be organized under the general corporation law of Oklahoma.”
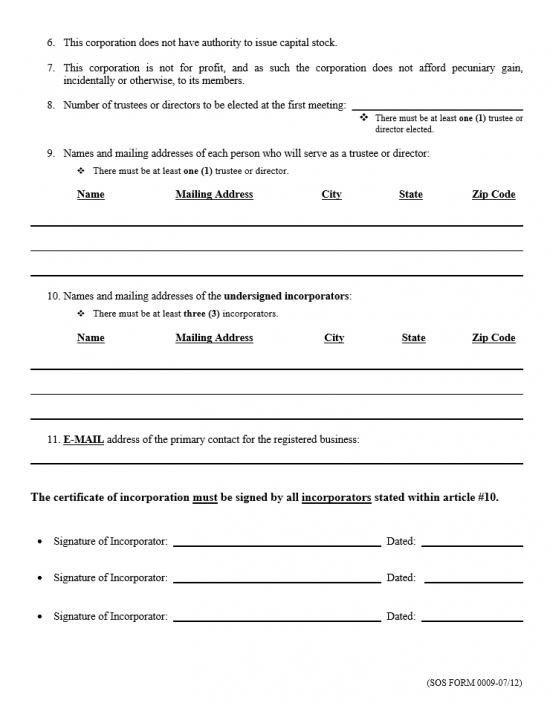
Step 7 – Articles 6 and 7 shall define the nonprofit corporation. Make sure to read them carefully.
Step 8 – In Article 8, report the Number of Trustees or Directors that shall be elected during the first meeting (minimum 1).
Step 9 – In Article 9, report the Full Name and Full Address of the initial Trustees or Directors who shall serve this corporation at the time of formation. There will be a several blank lines with labeled areas (Name, Mailing Address, City, State, and Zip Code) to do this.
Step 10 – In Article 10, report the Full Name and Address of all the Incorporators of this nonprofit in the space provided.
Step 11 – In Article 11, document the Email Address the Oklahoma Secretary of State may use to contact the nonprofit corporation.
Step 12 – The final section requiring attention will be the Signature lines. Each Incorporator previously reported must Sign his/her Name and provide a Date for this Signature.
 Step 13 – Next you will need to organize all documents, paperwork, and filings that must accompany the Oklahoma Certificate of Authority into one package with a check made out to “Secretary of State” for the Filing Fee ($25.00). Once done, you may submit this package by mail.
Mail To:
Secretary of State
Business Services
Colcord Center
421 NW 13th Street, Suite 210/220
Oklahoma City, OK 73103
How To File Electronically
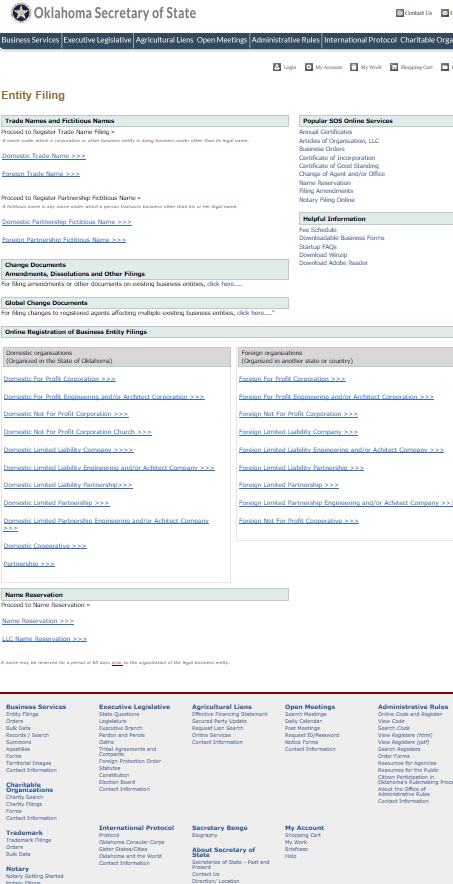
Step 1 – Open the Business Services page maintained by the Oklahoma Secretary of State’s website here: https://www.sos.ok.gov/business/default.aspx
Step 2 – Locate the heading “File Online,” then click on the the link labeled “Business Entity.”
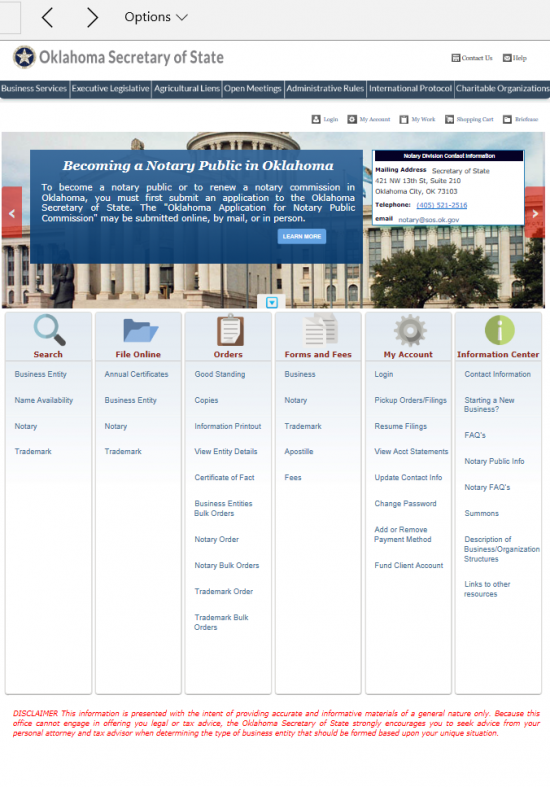 Step 3 – Under the heading “Domestic Organizations” then select the link labeled “Domestic Not For Profit Corporation.”
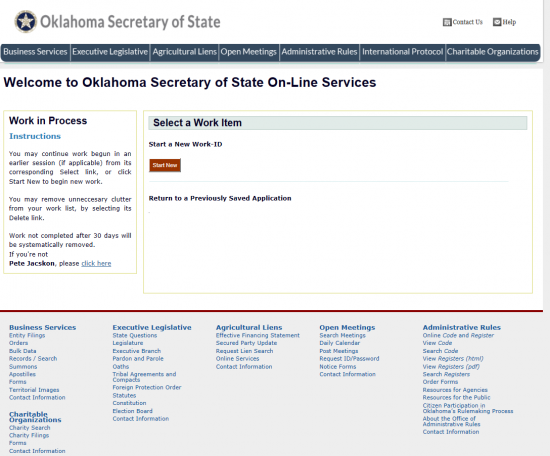
Step 4 – You will be prompted to create an Id. Do so. Then, when ready proceed to the first page of the online form. Here, under the heading “Select a Work Item” click the button labeled “Start New.”
Step 5 – The next page will state this filing is “pursuant to Title 18, Oklahoma Statutes, Section 1001.” It will also give some valuable information regarding seeking Tax Exempt Status. When you have finished reading this, select the “Next” button.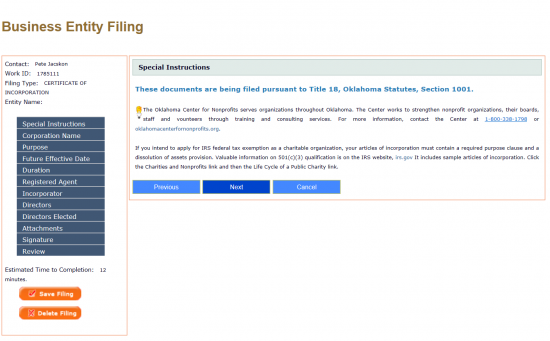
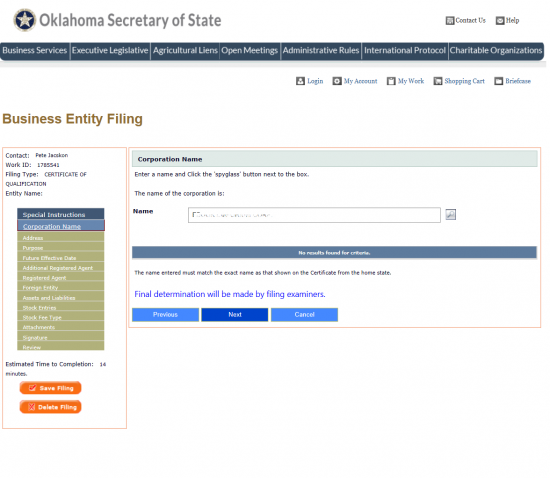
Step 6 – The next page will require you perform a search to make sure the Name you wish the nonprofit to operate under is available. In the field labeled “Name,” enter the Name you wish to use (including a word of incorporation) then select the Spy Glass Icon on the right of this field. If the Name is available, select the “Next” button.
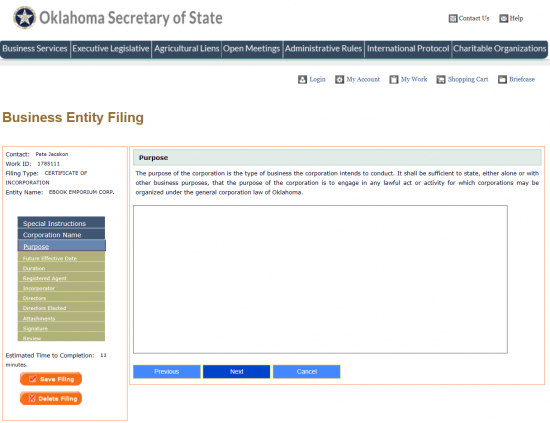
 Step 7 – The next page, “Purpose,” will require you enter the Purpose of forming this corporation. Note: If this entity will seek Tax-Exempt Status, then you will need to include specific I.R.S. 501(c)(3) language. Once you have entered the Purpose of this entity, select the “Next” button.
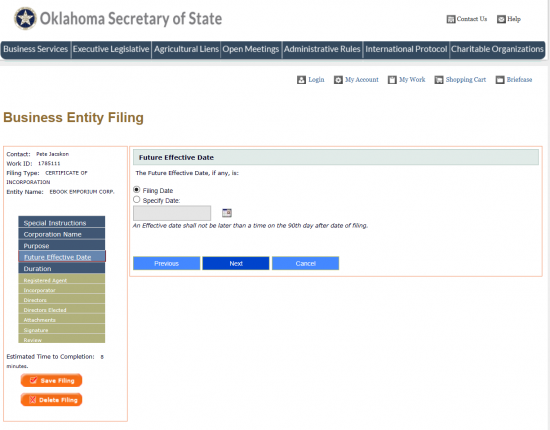
Step 8 – On this page, you may define a Future Effective Date for this form. If you wish the Effective Date of this filing to be in the future, select the second radio button (“Specify Date”) then enter a Date within 90 days of the Filing Date. If you wish the Effective Date and the Filing Date to be the same date then, select the first radio button labeled “Filing Date.”
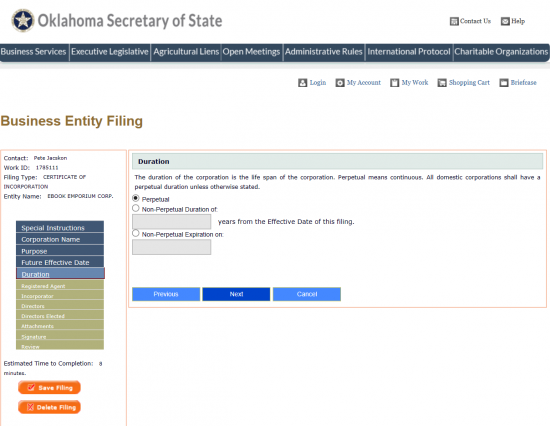
Step 9 – On the Duration page, you will need to define the lifespan of the corporation. If this nonprofit intends to operate indefinitely then select the first radio button “Perpetual.” If this nonprofit will operate with a definitive Dissolution Date, then you may define the lifespan in one of two ways. You may either check the second radio button, labeled “Non-Perpetual Duration of” then enter the number of years from the Effective Date of this Filing this corporation will remain active in the text box or you may select the third radio button “Non-Perpetual Expiration on” then enter the exact Date of Dissolution in the text box provided. Once you have properly defined this date, select the “Next” button.
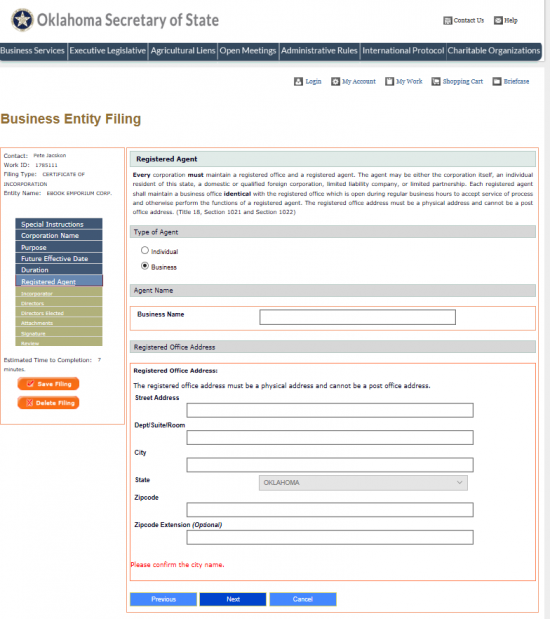
Step 10 – Now you will need to enter the Type, Identity, and Office Address of the Registered Agent for this nonprofit. First, under the heading “Type of Agent” select the radio button labeled “Individual” if the Registered Agent is an Individual or select the radio button labeled “Business” if the Registered Agent is a business entity. For our purposes, select the radio button labeled “Business.”
Step 11 – In the “Business Name” field, enter the Full Name of the Business serving as the Registered Agent.
Step 12 – Next, under “Registered Office Address,” enter the Street Address, Dept/Suite/Room, City, Zip Code, and (if applicable) Zip Code Extension where the Registered Office is physically located. Once you have entered this information select the button labeled “Next.”
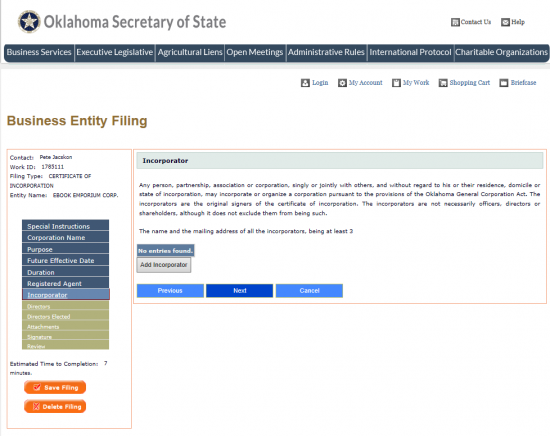
Step 13 – On this page, locate the button labeled “Add Incorporator” then select it.
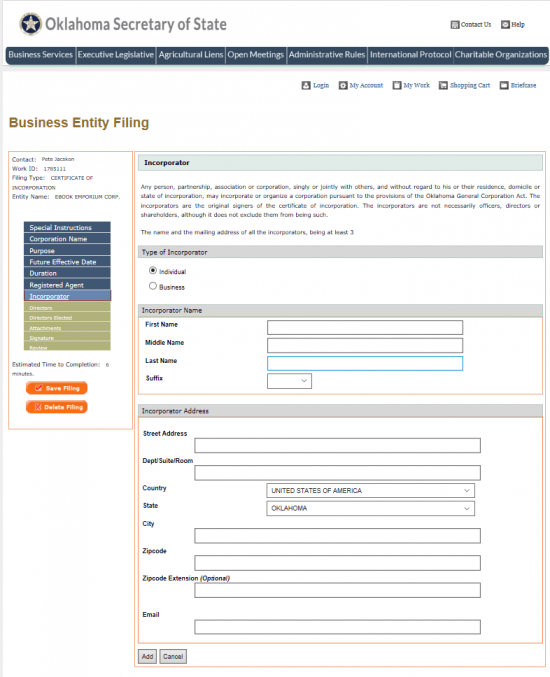
Step 14 – On this screen, select the either the radio button labeled “Individual” or the radio button labeled “Business” to indicate what type of entity the Incorporator is. For our purposes select “Individual.”
Step 15 – In the Incorporator Name section, enter the First Name, Middle Name (if applicable), Last Name, and (if applicable) Suffix of the Incorporator being reported here.
Step 16 – Use the fields in the Incorporator Address section to fully document the exact Address of the Incorporator being reported. You will have several fields to do this with: Street Address, Dept/Suite/Room, Country, State, City, Zip Code, Zip Code Extension (Optional), and Email. When you are done entering information on this page, select the button labeled “Add.”
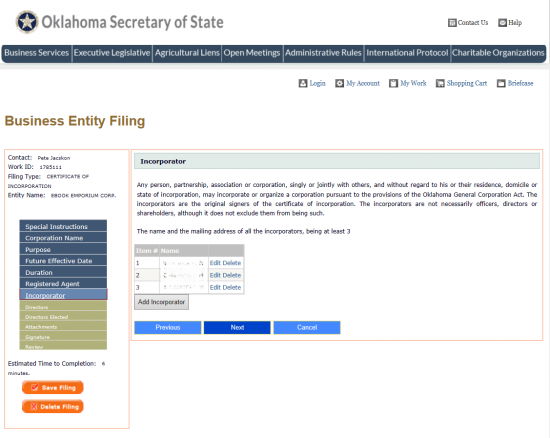
Step 17 – The Incorporators you add will be displayed in a table. Each row will display the Name plus an Edit and Delete link should you need to perform either of these actions. If you wish to enter the information for more Incorporators, select the “Add Incorporator” button. Once done, select “Next.” There must be at least three Incorporators.
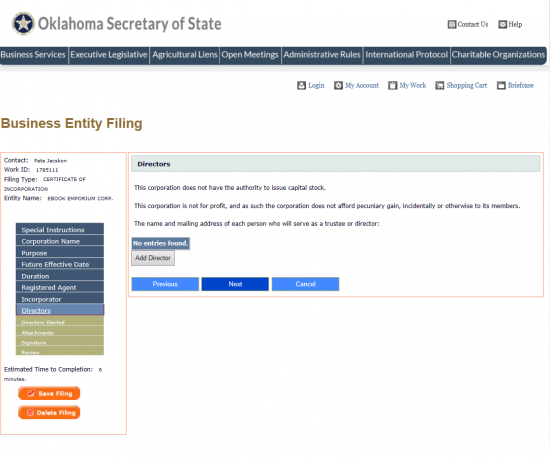
Step 18 – Next, you will need to add information for the initial Directors or Trustees of this nonprofit. When you are ready to do so, select the button labeled “Add Director.”
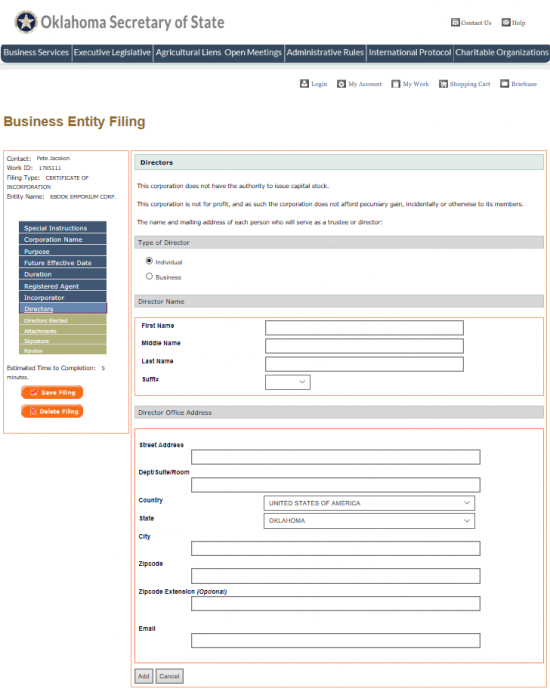
Step 19 – On this page, you must use the section “Type of Director” to indicate if this is an Individual or a Business Entity. There will be a radio button for each of these choices. Select the appropriate one.
Step 20 – Under Director Name, enter the First Name, Middle Name, Last Name, and select a Suffix to define who the Director is. Note: Middle Name and Suffix are optional fields.
Step 21 – In the Director Office Address Section, enter the Street Address, Dept/Suite/Room, Country, State, City, Zip Code, Zip Code Extension, and Email for the Director’s Address. Note: Dept/Suite/Room, Zip Code Extension, and Email are optional fields. Once you are done, select the button labeled “Add.”
Step 22 – This page will give you an opportunity to review, edit, or delete an entry in a table displaying the Director you reported. If you wish you may add more Directors by selecting the “Add Director” button. When finished, select “Next”
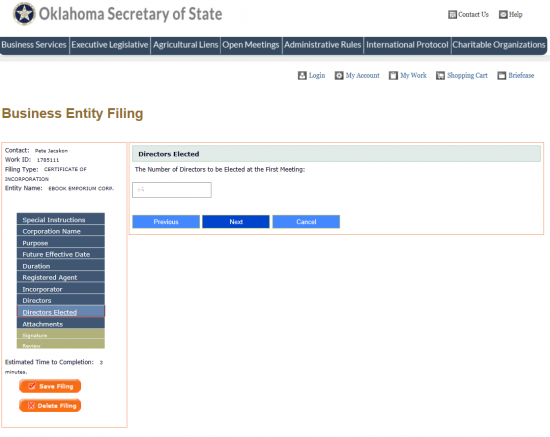
Step 23 – On the Directors Elected page, enter the Number of Directors who will be elected on the first meeting. Then click on the “Next” button.
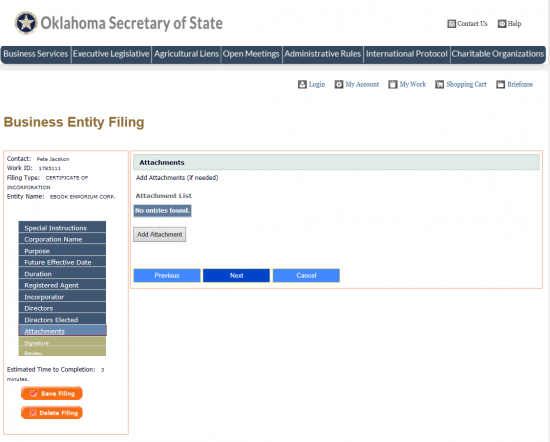
Step 24 – This Attachments page will give you the opportunity to attach files to this form. All documents that need to be submitted with this form should be done so here. Use the “Add Attachment” button to locate the file on your computer then upload it. Once finished, select the “Next” button.
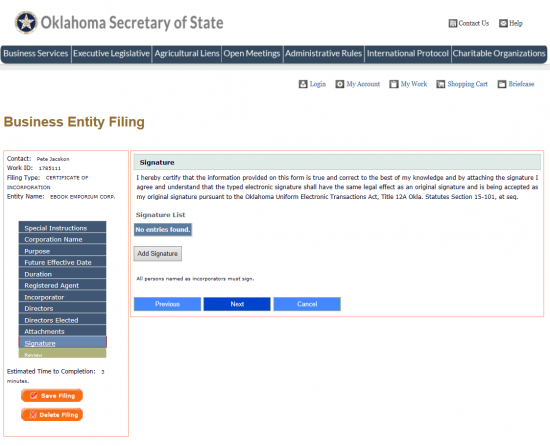
Step 25 – The Incorporators of this nonprofit will need to provide an Electronic Signature. Do this by selecting the “Add Signature” button.
Step 26 – Indicate if this is an Individual or a Business Entity providing this Signature. If it is an Individual, select the first radio button. If this is a Business Entity, select the second radio button. For our purposes, select the first radio button.
Step 27 – In the field labeled Signature, the Signature party must enter his/her Name.
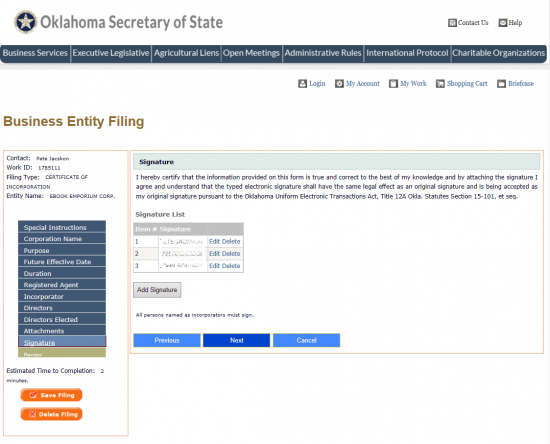
Step 28 – You may review the Signature List table provided. Here you may edit, delete, or add more signature parties. Once finished, select the “Next” button. All Incorporators must sign this document.
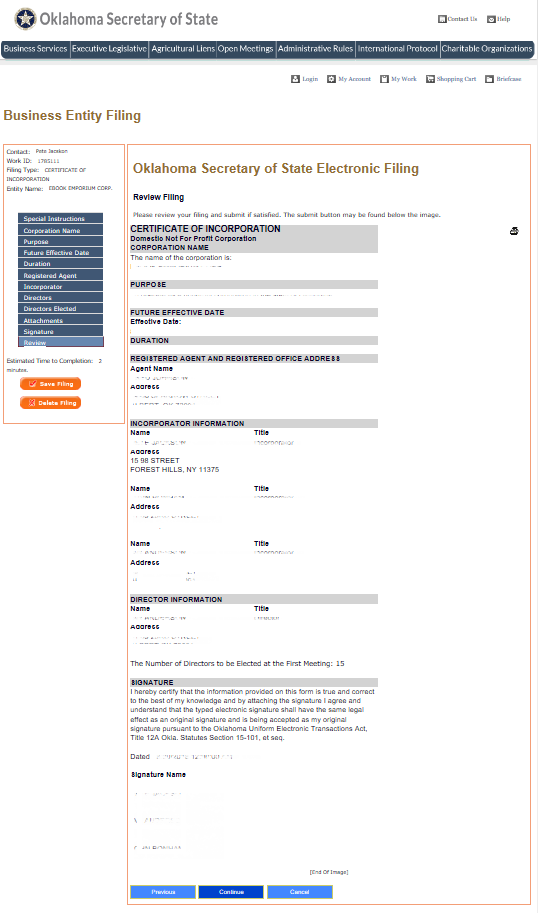
Step 29 – This page will give you the opportunity to review all of your information. If it is incorrect, you may use the side menu displaying section headings on the left to navigate to any areas needing correcting. If it is correct, select the “Continue” button to proceed to an area where you will be asked to enter your credit card information so that you may pay the “$25.00” Filing Fee.
